Wednesday, December 7, 2016

Instant Pot chili

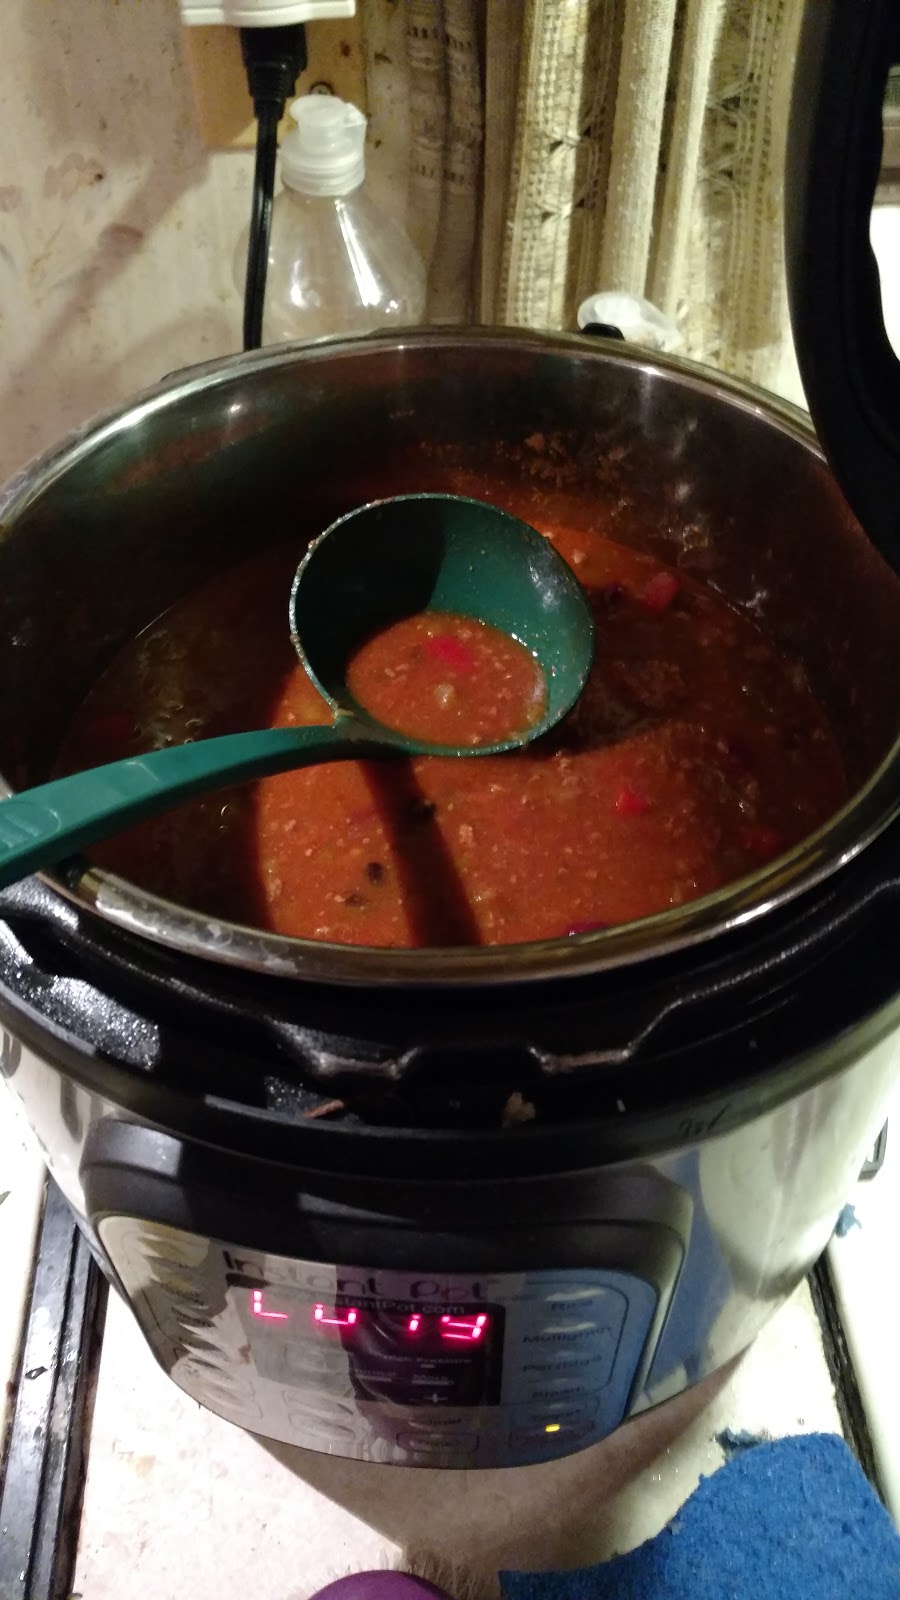
     So you'll notice a lot of these posts have a common theme: my Instant Pot. I have for sure become a convert. Although I don't use my Instant Pot every day (heck, I don't even cook every day!), I keep experimenting around with it to try more and more recipes.  Back in the Fall, I had an abundance of leftover cornbread from a friend, so my mind turned to making a chili to go with the cornbread..  It was delicious!

Delicious chili without the hours of cooking
Pressure Cooker Competition Chili Con Carne from This Old Gal http://thisoldgal.com/pressure-cooker-competition-chili-con-carne/

Ingredients:

3 Tablespoons extra virgin olive oil
1½ cups large diced onion
½ cup large dice sweet red bell pepper
1-2 medium green chiles, stems and seeds removed, finely diced
2 Tablespoons garlic, minced
1½ teaspoons ground cumin
1 Tablespoon chili powder
1 teaspoon dry oregano
1½ teaspoons salt
½ teaspoons freshly ground black pepper
1½ pounds ground beef
1 Tablespoon Worcestershire Sauce
1 28 ounce can ground peeled tomatoes + ½ can fresh water
1 14 ounce can black beans rinsed and drained
1 14 ounce can of kidney beans, rinsed and drained

Procedure:

1) Push the Sauté or Browning button on your Pressure Cooker and allow to heat.
2) Add oil to the Pressure Cooker cooking pot.
3) Add ground beef, breaking it up well with a wooden spoon.
4) Cook until the beef is slightly browned, and then drain fat.
5) Add onions, bell pepper and green chiles and sauté for three minutes.
6) Add garlic, cumin, chili powder, oregano, salt and pepper.
7) Cook another minute.
8) Add Worcestershire Sauce, tomatoes, water and beans and stir.
9) Lock the lid on your Pressure Cooker and close the Pressure Value.
10) Cook on High Pressure and set the time for 10 minutes.
11) Allow a 10 minute natural release and then quick release.
12) Serve as it or Select Sauté and allow to simmer for a thicker chili.


Yummy warm chili

  This is a good recipe for the cold winter nights (hmmm... maybe I should make this again soon).  A very good standard chili (much better than canned!) without having to wait the hours and hours that traditional stovetop chili takes to cook and infuse flavors.  It fed us for days!  In addition to cornbread, I also recommend putting some shredded cheese in the chili.  I'm never going to pass up an opportunity to eat cheese....  Yum!

Sunday, December 4, 2016

Berry Margaritas


Ah, berry margaritas. One of those lovely things to have on a hot summer's day when you have lots of leftover berries from the farmer's market. After a quick internet search, this is the recipe I decided to use:

Triple Berry Margaritas. So delicious!
Triple Berry Margarita
from http://www.driscolls.com/Recipe/Triple-Berry-Margarita

Ingredients:

1 Package (6 ounces) Driscoll's Blackberries, plus more for garnish
1 Package (6 ounces) Driscoll's Raspberries
1 Package (16 ounces) Driscoll's Strawberries, hulled and sliced
1/4 Cup sugar, or to taste
6 Ounces tequila
2 Ounces triple sec
4 Ounces fresh lime juice
1 fresh lime wedge
Salt for glasses
Ice

Procedure:

1) Puree berries in a blender until smooth. Strain pureed berries through sieve into pitcher to remove seeds. A chinois or a colander may also be used. Add sugar, to taste. Add tequila, triple sec and lime juice and stir until combined.
2) Prepare four glasses by rubbing rims with a wedge of lime and dip in salt. Add ice to glasses. Pour margarita mixture into four glasses and garnish with berries, as desired.

Notes: I used a sea salt/sugar combination with lime juice to rim the glasses.  

The results?  Amazing margaritas at home without the expense of buying one in a restaurant or having to limit yourself because you have to drive home afterwords.  Honestly, why would you ever buy these in a restaurant?  I made these quite a few times over the summer.  Try the sugar/salt mixture recommended above to line your glasses.  I liked it much better than the traditional salt.

As far as making them is concerned, it is simplicity itself.  I ended up buying less-breakable plastic margarita glasses since i was making them so often.  I used fresh berries, or a fresh/frozen combination, or frozen berries. They all worked fine.  Don't skimp out on the lime juice, though.  They taste a little off without it.

Another view of the margarita.  I just love the deep berry color.

Instant Pot oreo cheesecake

I'm finally starting to make up blogs for things that I made months ago... life can get too busy sometimes!

I've talked in previous blogs about the Instant Pot, a wonderfully versatile multi-function cooker. To get more ideas, I have joined the Instant Pot group on Facebook. One of the most popular posts are posts about making a cheesecake in the Instant Pot. Making a cheesecake without having to use the oven? The idea sounded too good to be true. I browsed recipes and found:
Instant Pot Oreo Cheesecake

http://www.mybakingaddiction.com/instant-pot-oreo-cheesecake/

yield: 6 servings
prep time: 15 minutes
cook time: 40 minutes
total time: 55 minutes

Ingredients:

For the Crust:
12 whole Oreo cookies, crushed into crumbs
2 tablespoons salted butter, melted

For the Cheesecake:
16 ounces cream cheese, room temperature
1/2 cup granulated sugar
2 large eggs, room temperature
1 tablespoon all-purpose flour
1/4 cup heavy cream
2 teaspoons pure vanilla extract
8 whole Oreo cookies, coarsely chopped

For the Topping:
1 cup whipped cream or whipped topping
8 whole Oreo cookies, coarsely chopped
chocolate sauce, optional

Directions:
1) Tightly wrap the bottom of 7-inch spring form pan in foil and spray the inside of the pan with non-stick cooking spray.
2) In a small bowl, stir together the 12 crushed Oreo cookies and melted butter and press the crumbs into the bottom of the prepared pan.
3) Place pan in freezer for 10-15 minutes.
4) In the bowl of your stand mixer fitted with the paddle attachment, or in a large bowl with an electric mixer, beat the cream cheese until smooth. Add sugar and mix until combined. Add eggs, one at a time, fully incorporating each before adding the next. Making sure to scrape down the bowl in between each egg. Add in the flour, heavy cream, and vanilla and mix until smooth. Fold in 8 chopped Oreo cookies and pour batter into prepared pan.
5) Cover the top of the pan with a piece of foil.
6) Pour 1 1/2 cups of water into the Instant Pot and place the trivet in the bottom of the pot.
7) Create a "foil sling" by folding a 20-inch long piece of foil in half lengthwise two times. This "sling" will allow you place and remove the spring form pan with ease.
8) Place the cheesecake pan in the center of the sling and carefully lower the pan into the Instant Pot. Fold down the excess foil from the sling to ensure the pot closes properly.
9) Lock the lid into place and make sure the vent is closed "sealing". Press the "Manual" button and cook on high pressure for 40 minutes.
10) When the Instant Pot beeps, hit the "Keep Warm/Cancel" button to turn off the pressure cooker. Allow the pressure to release naturally for 10 minutes and then do a quick release to release any pressure remaining in the pot.
11) Carefully unfold the foil sling and remove the cheesecake from the pot to a cooling rack using the foil sling "handles". Uncover the cheesecake and allow it to cool to room temperature.
12) Once the cheesecake has cooled, refrigerate it for at least 8 hours, or overnight.
13) Before serving, top with whipped cream, chopped Oreo cookies, and a drizzle of chocolate sauce.
Notes:
If you would like to bake this cheesecake in an oven instead of an Instant Pot, simply follow directions 1-4. Place the pan into a larger pan and pour boiling water into the larger pan until halfway up the side of the cheesecake pan. Bake at 350°F for about 40-45 minutes, the edges will appear to be set, but the center will still have some jiggle to it. At this point, turn off the oven, but leave the door cracked and allow the cheesecake to rest in the cooling oven for one hour. After one hour has passed, carefully remove the cheesecake from the water bath and place on a cooling rack to cool completely. Once the cheesecake is completely cooled, place it into the refrigerator for at least 8 hours.

A slice of deliciousness
The results?  Amazing, of course!!  Definitely still a bit of work since everything needs to be prepped using different machines (e.g., food processor for Oreo cookie crumbs, stand mixer for cake mix, etc), but so so so worth it!  The taste is to die for and there's not nearly the same amount of trouble as there is making it in the oven.  My only particular issue?  I got so excited when it came to take the picture of my finished cheesecake that I threw my whole phone into the cheesecake before I even got a chance to take a picture.  Here is what phone-smashed cheesecake looks like, in case you were curious:
Cheesecake and phones just don't mix...


Monday, May 30, 2016

Mozzarella Macaroni and Cheese

Mozzarella macaroni and cheese
  So I've been making a lot of lasagna lately.  I originally made it for co-workers when I subbed at my old job (the Web of Life Field school) at the beginning of this month.  I had leftover materials so that inspired me to make it for my game night with friends on Wednesday last week.  Then I had more leftovers and made it for Game of Thrones night on Sunday.  And then I had more leftovers and... well, I think you get the point.  So, I had leftover mozzarella, leftover basil, and even leftover cooked macaroni from a separate (non-lasagna) meal.  Not wanting to make even more lasagna, I researched macaroni and mozzarella and came across this intriguing recipe.  So I decided to try it out.

Mozzarella macaroni and cheese 

Ingredients:

cups uncooked elbow macaroni

tablespoons butter

tablespoons Gold Medal™ all-purpose flour

teaspoon salt

teaspoon grated or very finely chopped garlic

cups milk

cups shredded mozzarella cheese (8 oz)

1/4 cup chopped fresh basil leaves

Procedure:

1 Cook and drain macaroni as directed on package.

2 In 10-inch skillet, melt butter over medium heat. Using whisk, stir in flour, salt and garlic. Cook 2 to 3 minutes, or until mixture smells nutty and is lightly golden, stirring constantly with whisk.

3 Add milk. Continue to beat with whisk, scraping bottom of skillet until mixture heats to boiling. Mixture will thicken. Remove from heat; add cheese and basil. Stir with whisk until smooth. Stir in drained macaroni.

4 Serve with additional basil leaves if desired.

Mozzarella macaroni and cheese served with a caesar salad

It was very yummy; very rich and very creamy.  Definitely redolent of fettuccine alfredo and a completely different taste from your traditional macaroni and cheese.  Imagine fettuccine alfredo with macaroni noodles instead of fettuccine and you'll get the basic taste of this dish.  All in all, this is a recipe that I would make again.  I shall definitely have to experiment around with other cheeses for future macaroni and cheese recipes.....

Sunday, March 20, 2016

Crock pot chicken fricassee

     Chicken Fricassee is a dish that I have been wanting to try for years.  I had never heard of chicken fricassee (somehow it wasn't part of my childhood in LA) until I read A Breath of Snow and Ashes by Diana Gabaldon (one of my favorite authors [this book is part of her wonderful Outlander series]) and one of the characters were eating chicken fricassee.  It sounded really delicious, so I researched what it was and how to make it.  One of the many recipes for chicken fricassee I came across was actually inspired by A Breath of Snow and Ashes (and the Outlander series as a whole) from a blog called Outlander kitchen.  I read it and knew it was the recipe I had to try.


Chicken Fricassee. (Note: the sauce is not green, despite photographic evidence!)

Crock Pot Chicken Fricassee from Outlander Kitchen 

Ingredients:

Bone-in Chicken Thighs, rinsed and trimmed of extra fat and skin – 2 lbs (6-8 pieces)
All Purpose Flour – ¼ Cup
Salt – ½ tsp
Pepper – ¼ tsp
Olive Oil – 2 Tble
Butter – 2 Tble
Mushrooms, wiped clean, halved – ½ lb
Yellow Potatoes, trimmed, 2” pieces – 1 lb
Lemon Juice – 2 Tble
Small Onions (about 1” diameter), peeled – ¾ lb (or 1 large onion, julienned)
Carrots, peeled and cut into 4-6 pieces each – 2 medium
Garlic, papery skin removed  – 1 whole head
Butter – 2 Tble
Bay Leaves – 2
Fresh Thyme – 2 sprigs
Salt + Pepper – pinches
Chicken Stock – 1 Cup
White Wine – ½ Cup
Whipping Cream – ½ Cup
Egg Yolks – 2
Salt + Pepper – to taste
Serves: 4

Procedure:
Pat the chicken pieces dry.  Mix together the flour, salt and pepper in a small bowl.  Dredge the thighs in flour one at a time, shaking off the excess.
Heat a large heavy frying pan over medium-high.  Heat the olive oil and butter until bubbling and fry half of the chicken, skin side down, until light golden, about 3-4 minutes.  Flip and fry another 3 minutes on the second side.  Remove to the crock pot and repeat with the other half of the chicken.
Toss the mushrooms and potatoes with the lemon juice, then nestle them, along with the onions, carrots, garlic, butter, bay leaves and thyme in amongst the chicken pieces.  Season with salt and pepper, pour in the stock and wine, and rock the crock pot gently to settle and mix.
Cook on low for 4-6 hours.
Move the oven rack to the top position and preheat the oven to 300°.
When the chicken and vegetables are tender, turn off the crock pot.  Discard the garlic, bay leaves and thyme.  Use a slotted spoon to remove the chicken and vegetables to an oven-proof dish, and keep warm in the oven, uncovered, while you finish the sauce.
Strain the cooking liquid from the crock pot into a medium saucepan.  Use a spoon to skim the surface of fat, then reduce the liquid over medium-high heat until it measures about 1½ cups.  Reduce the heat to medium-low.
Beat together the egg yolks and cream.  Add 2-3 tablespoons of the hot cooking liquid into the cream mixture and stir well, then add the cream back into the saucepan and stir constantly until hot, and slightly thickened, about 5 minutes.  Season to taste and keep warm.
When the sauce is ready, turn the oven’s to broil to lightly brown and crisp the chicken’s skin, about 4 or 5 minutes.
Divide the chicken and vegetables on 4 plates and spoon over the sauce.
     The results?  Alas, not as stellar as I had hoped.  The chicken fricassee tasted good but was somehow both a bit too rich and a bit too bland for my taste buds.  I even skipped the last part about broiling the chicken as I had no large chicken pieces left to boil (they all just kind of melted into the ingredients).  Maybe six hours was too long to cook it?  Maybe I shouldn't have substituted russet potatoes for golden?  Oh well.  Still, I think chicken fricassee as a whole holds promise.  Maybe I'll get back to it eventually and try another recipe.  In the meanwhile, I shall continue to read my Outlander books and continue to enjoy this wonderful blog full of Outlander-inspired recipes.

    A note on the recipe:  I mentioned in my previous blog that I have recently bought an Instant Pot a seven-in-one programmable cooker.  An Instant pot combines a pressure cooker, a rice cooker, a slow cooker, a steamer, a food warmer, a saute pan and a yogurt maker.  Since I bought the instant pot, my husband and I have played around with the various features and have come to really love it.  What I liked about using the Instant pot for this particular recipe was that everything was cooked in one container.  I browned the chicken in the Instant pot using the saute feature, then put all the ingredients in and used it as a slow cooker and then finished off the sauce using the saute feature again.  What a wonderful invention!!  Expect to see more recipes from my fabulous Instant Pot...

Saturday, March 5, 2016

Pumpkin pie oatmeal

Pumpkin pie oatmeal.
     As you can imagine, I receive many food related e-mails.  I was perusing an e-mail from MyFitnessPal entitled "10 slow cooker breakfasts under 350 calories."  I've been trying to shed some pounds, use up all my old pumpkin related food items (I'm afraid I go rather crazy around fall pumpkin season) and use the slow cooker feature of a new cooking appliance I bought called an Instant Pot.  This recipe combined all three elements so I decided to try it out.

Pumpkin pie oatmeal from http://www.aroundmyfamilytable.com/pumpkin-pie-oatmeal/

Ingredients:
  • 1 1/2 cups steel cut oats
  • 4 1/2 cups water (depending on if you like thicker or thinner oatmeal)
  • 1 cup canned pumpkin puree (about half a can)
  • 2 tsps pure vanilla extract
  • 2 tsps pumpkin pie spice
  • 1/4- 1/2 cup brown sugar
Procedure:

  1. Combine all ingredients in slow cooker and cook on low for 6-8 hours. Stirring occasionally if you can.
  2. Season to taste with salt and/or more brown sugar.
  3. ©Around My Family Table

     My Instant Pot cooked it beautifully.  It looked and smelled wonderful.  The taste was, alas, just... so so.  It certainly didn't resemble pumpkin pie.  It just tasted blah.. overspiced even.  Like oatmeal and cinnamon but not sweet enough.  Even adding more brown sugar didn't really do much.  I felt like it was perhaps a bit heartier because of the pumpkin, and it did made a lot of oatmeal (I am still finishing it off almost two weeks later), but this is probably not a recipe that I will make again.  Oh well. I suppose not all recipes can be amazingly delicious.

Thursday, February 25, 2016

Homemade chicken soup from scratch

   Earlier this month, in the week leading up to the Super Bowl, both my husband and I were quite sick.  :-(  Poor Scotty caught the flu and I caught something that was a strange combination of both a cold and a flu.  Combined, we were two sick, miserable people sharing a small bed and probably getting each other even sicker.  What could possible cure our ills?  Homemade Chicken soup!
A wonderful bowl of homemade Chicken noodle soup
    How should I make a delicious health-giving soup?  First, let's start with the broth.  I wanted to make a bone broth, which is basically a chicken stock/broth that has been cooked so long that the nutrients from the bones leech into the liquid, creating a nutritious and delicious broth.  This seemed like just the kind of thing a sick person would need!  I used the same stock recipe that I have cooked before (see http://insearchoftheperfectmacaroniandcheese.blogspot.com/2011/01/homemade-chicken-stock.html) except this time I cooked it in my slow cooker for way way way longer.  I'm talking sixteen hours!  I started my broth the night before and had it cook until well into the afternoon.  By the end, the bones were literally dissolving into the soup.  The aroma made the house smell wonderful and the taste was divine!   Just one sip gave you energy and just felt nutritious.  I have tried making stock in the slow cooker before, but never for this long; I am definitely going to have to do this again.

All of the ingredients are in, ready to be turned into nourishing bone broth.
Same stock, sixteen hours later...
 Okay, so now I've got the broth, let's go onto the soup!
Here is what the finished soup looked like.

Homemade Chicken Soup from Scratch

Ingredients:


Homemade chicken (bone) broth

Chicken from bone broth, shredded
6 medium carrots, sliced
2 large onions, chopped
6 celery stalks, sliced
1 bag German egg pasta
Olive oil
Salt 
Pepper
Italian seasoning


Procedure:

1. Cut up onions, carrots and celery.
2. Heat up some olive oil in the bottom of a large pot (I used my dutch oven) and add in the vegetables until they are soft.
3.  Add bone broth, chicken and pasta.
4.  Cook the soup for ten to fifteen minutes or until all the ingredients are cooked to your liking.
5. Season with salt, pepper and Italian seasoning.
6. Enjoy!

  The soup was every bit as amazing as I hoped that it would be.  The broth was to die for, and the other ingredients just made you feel good.  This was exactly what Scott and I needed to help us through our sickness.  Plus, this made A LOT of food.  We had chicken soup for about a week straight and then froze the rest.  The only complaint that I had is that when I refrigerated the soup (with the noodles in it), the noodles absorbed all of the wonderful broth.  It turned from chicken soup to chicken casserole.  I suppose this just goes to show that it was real homemade soup.  If you decide to make this soup, I recommend keeping the noodles separate from the soup when you store it so you can continue to enjoy this wonderful, health-giving concoction!