Thursday, December 8, 2016

Pecan Pie

     It's that time of year again.  Time for eating, cooking, baking, and generally stuffing oneself as much as possible.  This year Scott and I once again went to New England for Thanksgiving.  We can't have a visit to New England without visiting his Ma and we couldn't visit his mother without the help of our dear friend Pete who lets us stay at his house.  To show just a little bit of thanks for his wonderful friendship to us over the years, we made dinner for Pete on Monday.  We made macaroni and cheese (of course), a four fruit crisp, and pecan pie (which sadly wasn't read until the next day).  You can see my recipe for macaroni and cheese here and my recipe for four fruit crisp here.  Pecan pie is a new recipe so deserves its own blog.

Pecan Pie
Pecan Pie from The Pioneer Woman Cooks http://thepioneerwoman.com/cooking/pecan-pie/

Ingredients:

1 whole Unbaked Pie Crust 
1 cup White Sugar
3 Tablespoons Brown Sugar
1/2 teaspoon Salt
1 cup Corn Syrup
3/4 teaspoons Vanilla
1/3 cup Melted Butter (salted)
3 whole Eggs, Beaten
1 cup (heaping) Chopped Pecans

Procedure:

1) First, whip up your pie crust.
2) Stir three eggs in a small bowl.
3) In a separate bowl, add the white sugar, brown sugar, and salt together.
4) Add the corn syrup and then the melted butter.
5) Mix everything together.
6) Add in the beaten eggs and stir again.
7) Next comes the vanilla extract with one last stir
8) Pour chopped pecans in the bottom of the unbaked pie shell. Spread them out into a flat layer.
9) Pour the corn syrup/egg mixture gently over the top.   The pecan bits will slowly float to the top.

10) Carefully carry it to the oven and bake it for 50 minutes. Check on it about halfway through.  If the outer crust is browning too quickly, cover it gently with some aluminum foil.
11) Allow to cool for several hours or overnight. Serve in thin slivers.

NOTE: PIE SHOULD NOT BE OVERLY JIGGLY WHEN YOU REMOVE IT FROM THE OVEN. If it shakes a lot, cover with foil and bake for an additional 20 minute or until set. Required baking time seems to vary widely with this recipe. Sometimes it takes 50 minutes; sometimes it takes 75!

Ooey Gooey Deliciousness

     The result was an absolutely delicious and relatively easy to make pecan pie.  I admit to cheating a little and buying a pre-made crust.  Some day soon I'll make the whole thing from scratch.  I just love pecan pie; the contrast between the crunchy pecan topping and the ooey gooey sugary filling.  Yum!  It was so easy that Scott (with my help) even made a second one to bring to Thanksgiving.

Wednesday, December 7, 2016

Instant Pot macaroni and cheese

Katie's note: This is another blog from back in September.

     Today I was hungry but didn't really have anything read to eat in my fridge. Knowing that I had a few blocks of cheddar cheese and milk left in the fridge, I decided to research stovetop macaroni and cheese. After doing a few searches, I thought I would also research Instant Pot macaroni and cheese and came across the recipe from the blog Dad cooks dinner, a blog I stumbled across and have been itching to try the recipes in. Check it out at: http://dadcooksdinner.com/2013/04/pressure-cooker-macaroni-and-cheese.html/ Using this recipe for inspiration, I modified it based upon what I had at hand. So, here goes:
Pressure Cooker Macaroni and Cheese
Instant Pot Macaroni and Cheese (based upon Pressure Cooker Macaroni and Cheese) from http://dadcooksdinner.com/2013/04/pressure-cooker-macaroni-and-cheese.html/

Ingredients: 

1 pound dried elbow macaroni
2 tablespoons butter
1 tablespoon yellow mustard
1 teaspoon hot pepper sauce
1 tablespoon Diamond Crystal kosher salt or 2 teaspoons table salt
4 cups water
1 (12 ounce) can evaporated milk
16 ounces shredded extra-sharp cheddar cheese
6 ounces shredded Parmigiano cheese
1 cup panko bread crumbs (optional)

Notes:

4 cups of water is just enough to cook 1 pound (16 ounces) of pasta. No draining is necessary; the water will be absorbed by the pasta. If you have a smaller box of pasta - 12 ounces and 13.25 ounces are common sizes of whole wheat pasta - cut the water back to 3 cups. (Everything else can stay the same.)

Procedure:


1. Pressure cook the pasta and spices: Stir the macaroni, butter, mustard, hot pepper sauce, salt, and 4 cups water in the instant pot. Lock the lid on the instant pot and cook on Manual high pressure for 4 minutes. When the cooking time is done, quick release the pressure and remove the lid.
2. Stir in the evaporated milk and cheese: Turn the electric pressure cooker to sauté-low or keep warm mode and stir in the evaporated milk. Test a piece of pasta by taking a bite - it should be al dente, but cooked through. If the pasta is still tough in the middle, simmer it for a few minutes, until it is tender. Stir in the cheese one handful at a time, stirring constantly and waiting for the current handful to melt before adding the next handful.
3) Optional step, if you like a toasted bread crumb topping: Pour the macaroni into a 3 quart broiler-safe dish, patting it down to level out the surface. Sprinkle the panko over the macaroni and cheese in an even layer. Broil the macaroni and cheese on high until the bread crumbs are toasted, about 5 minutes. Check the bread crumbs often - they go from pale brown to burnt in a flash.
The results? Okay. A lot of macaroni and cheese. I skipped the panko topping (which I usually love) in the interest of quicker cooking time.  However, the macaroni and cheese itself was a bit grainy and didn't quite have the right taste for my palate. Still, another reason to continue with my blog name and keep trying to find the perfect macaroni and cheese...
Pretty good... not great.  Plus why do they call it macaroni and cheese when it's really shells and cheese?

Instant Pot chili

     So you'll notice a lot of these posts have a common theme: my Instant Pot. I have for sure become a convert. Although I don't use my Instant Pot every day (heck, I don't even cook every day!), I keep experimenting around with it to try more and more recipes.  Back in the Fall, I had an abundance of leftover cornbread from a friend, so my mind turned to making a chili to go with the cornbread..  It was delicious!

Delicious chili without the hours of cooking
Pressure Cooker Competition Chili Con Carne from This Old Gal http://thisoldgal.com/pressure-cooker-competition-chili-con-carne/

Ingredients:

3 Tablespoons extra virgin olive oil
1½ cups large diced onion
½ cup large dice sweet red bell pepper
1-2 medium green chiles, stems and seeds removed, finely diced
2 Tablespoons garlic, minced
1½ teaspoons ground cumin
1 Tablespoon chili powder
1 teaspoon dry oregano
1½ teaspoons salt
½ teaspoons freshly ground black pepper
1½ pounds ground beef
1 Tablespoon Worcestershire Sauce
1 28 ounce can ground peeled tomatoes + ½ can fresh water
1 14 ounce can black beans rinsed and drained
1 14 ounce can of kidney beans, rinsed and drained

Procedure:

1) Push the Sauté or Browning button on your Pressure Cooker and allow to heat.
2) Add oil to the Pressure Cooker cooking pot.
3) Add ground beef, breaking it up well with a wooden spoon.
4) Cook until the beef is slightly browned, and then drain fat.
5) Add onions, bell pepper and green chiles and sauté for three minutes.
6) Add garlic, cumin, chili powder, oregano, salt and pepper.
7) Cook another minute.
8) Add Worcestershire Sauce, tomatoes, water and beans and stir.
9) Lock the lid on your Pressure Cooker and close the Pressure Value.
10) Cook on High Pressure and set the time for 10 minutes.
11) Allow a 10 minute natural release and then quick release.
12) Serve as it or Select Sauté and allow to simmer for a thicker chili.


Yummy warm chili

  This is a good recipe for the cold winter nights (hmmm... maybe I should make this again soon).  A very good standard chili (much better than canned!) without having to wait the hours and hours that traditional stovetop chili takes to cook and infuse flavors.  It fed us for days!  In addition to cornbread, I also recommend putting some shredded cheese in the chili.  I'm never going to pass up an opportunity to eat cheese....  Yum!

Sunday, December 4, 2016

Berry Margaritas


Ah, berry margaritas. One of those lovely things to have on a hot summer's day when you have lots of leftover berries from the farmer's market. After a quick internet search, this is the recipe I decided to use:

Triple Berry Margaritas. So delicious!
Triple Berry Margarita
from http://www.driscolls.com/Recipe/Triple-Berry-Margarita

Ingredients:

1 Package (6 ounces) Driscoll's Blackberries, plus more for garnish
1 Package (6 ounces) Driscoll's Raspberries
1 Package (16 ounces) Driscoll's Strawberries, hulled and sliced
1/4 Cup sugar, or to taste
6 Ounces tequila
2 Ounces triple sec
4 Ounces fresh lime juice
1 fresh lime wedge
Salt for glasses
Ice

Procedure:

1) Puree berries in a blender until smooth. Strain pureed berries through sieve into pitcher to remove seeds. A chinois or a colander may also be used. Add sugar, to taste. Add tequila, triple sec and lime juice and stir until combined.
2) Prepare four glasses by rubbing rims with a wedge of lime and dip in salt. Add ice to glasses. Pour margarita mixture into four glasses and garnish with berries, as desired.

Notes: I used a sea salt/sugar combination with lime juice to rim the glasses.  

The results?  Amazing margaritas at home without the expense of buying one in a restaurant or having to limit yourself because you have to drive home afterwords.  Honestly, why would you ever buy these in a restaurant?  I made these quite a few times over the summer.  Try the sugar/salt mixture recommended above to line your glasses.  I liked it much better than the traditional salt.

As far as making them is concerned, it is simplicity itself.  I ended up buying less-breakable plastic margarita glasses since i was making them so often.  I used fresh berries, or a fresh/frozen combination, or frozen berries. They all worked fine.  Don't skimp out on the lime juice, though.  They taste a little off without it.

Another view of the margarita.  I just love the deep berry color.

Instant Pot oreo cheesecake

I'm finally starting to make up blogs for things that I made months ago... life can get too busy sometimes!

I've talked in previous blogs about the Instant Pot, a wonderfully versatile multi-function cooker. To get more ideas, I have joined the Instant Pot group on Facebook. One of the most popular posts are posts about making a cheesecake in the Instant Pot. Making a cheesecake without having to use the oven? The idea sounded too good to be true. I browsed recipes and found:
Instant Pot Oreo Cheesecake

http://www.mybakingaddiction.com/instant-pot-oreo-cheesecake/

yield: 6 servings
prep time: 15 minutes
cook time: 40 minutes
total time: 55 minutes

Ingredients:

For the Crust:
12 whole Oreo cookies, crushed into crumbs
2 tablespoons salted butter, melted

For the Cheesecake:
16 ounces cream cheese, room temperature
1/2 cup granulated sugar
2 large eggs, room temperature
1 tablespoon all-purpose flour
1/4 cup heavy cream
2 teaspoons pure vanilla extract
8 whole Oreo cookies, coarsely chopped

For the Topping:
1 cup whipped cream or whipped topping
8 whole Oreo cookies, coarsely chopped
chocolate sauce, optional

Directions:
1) Tightly wrap the bottom of 7-inch spring form pan in foil and spray the inside of the pan with non-stick cooking spray.
2) In a small bowl, stir together the 12 crushed Oreo cookies and melted butter and press the crumbs into the bottom of the prepared pan.
3) Place pan in freezer for 10-15 minutes.
4) In the bowl of your stand mixer fitted with the paddle attachment, or in a large bowl with an electric mixer, beat the cream cheese until smooth. Add sugar and mix until combined. Add eggs, one at a time, fully incorporating each before adding the next. Making sure to scrape down the bowl in between each egg. Add in the flour, heavy cream, and vanilla and mix until smooth. Fold in 8 chopped Oreo cookies and pour batter into prepared pan.
5) Cover the top of the pan with a piece of foil.
6) Pour 1 1/2 cups of water into the Instant Pot and place the trivet in the bottom of the pot.
7) Create a "foil sling" by folding a 20-inch long piece of foil in half lengthwise two times. This "sling" will allow you place and remove the spring form pan with ease.
8) Place the cheesecake pan in the center of the sling and carefully lower the pan into the Instant Pot. Fold down the excess foil from the sling to ensure the pot closes properly.
9) Lock the lid into place and make sure the vent is closed "sealing". Press the "Manual" button and cook on high pressure for 40 minutes.
10) When the Instant Pot beeps, hit the "Keep Warm/Cancel" button to turn off the pressure cooker. Allow the pressure to release naturally for 10 minutes and then do a quick release to release any pressure remaining in the pot.
11) Carefully unfold the foil sling and remove the cheesecake from the pot to a cooling rack using the foil sling "handles". Uncover the cheesecake and allow it to cool to room temperature.
12) Once the cheesecake has cooled, refrigerate it for at least 8 hours, or overnight.
13) Before serving, top with whipped cream, chopped Oreo cookies, and a drizzle of chocolate sauce.
Notes:
If you would like to bake this cheesecake in an oven instead of an Instant Pot, simply follow directions 1-4. Place the pan into a larger pan and pour boiling water into the larger pan until halfway up the side of the cheesecake pan. Bake at 350°F for about 40-45 minutes, the edges will appear to be set, but the center will still have some jiggle to it. At this point, turn off the oven, but leave the door cracked and allow the cheesecake to rest in the cooling oven for one hour. After one hour has passed, carefully remove the cheesecake from the water bath and place on a cooling rack to cool completely. Once the cheesecake is completely cooled, place it into the refrigerator for at least 8 hours.

A slice of deliciousness
The results?  Amazing, of course!!  Definitely still a bit of work since everything needs to be prepped using different machines (e.g., food processor for Oreo cookie crumbs, stand mixer for cake mix, etc), but so so so worth it!  The taste is to die for and there's not nearly the same amount of trouble as there is making it in the oven.  My only particular issue?  I got so excited when it came to take the picture of my finished cheesecake that I threw my whole phone into the cheesecake before I even got a chance to take a picture.  Here is what phone-smashed cheesecake looks like, in case you were curious:
Cheesecake and phones just don't mix...


Monday, May 30, 2016

Mozzarella Macaroni and Cheese

Mozzarella macaroni and cheese
  So I've been making a lot of lasagna lately.  I originally made it for co-workers when I subbed at my old job (the Web of Life Field school) at the beginning of this month.  I had leftover materials so that inspired me to make it for my game night with friends on Wednesday last week.  Then I had more leftovers and made it for Game of Thrones night on Sunday.  And then I had more leftovers and... well, I think you get the point.  So, I had leftover mozzarella, leftover basil, and even leftover cooked macaroni from a separate (non-lasagna) meal.  Not wanting to make even more lasagna, I researched macaroni and mozzarella and came across this intriguing recipe.  So I decided to try it out.

Mozzarella macaroni and cheese 

Ingredients:

cups uncooked elbow macaroni

tablespoons butter

tablespoons Gold Medal™ all-purpose flour

teaspoon salt

teaspoon grated or very finely chopped garlic

cups milk

cups shredded mozzarella cheese (8 oz)

1/4 cup chopped fresh basil leaves

Procedure:

1 Cook and drain macaroni as directed on package.

2 In 10-inch skillet, melt butter over medium heat. Using whisk, stir in flour, salt and garlic. Cook 2 to 3 minutes, or until mixture smells nutty and is lightly golden, stirring constantly with whisk.

3 Add milk. Continue to beat with whisk, scraping bottom of skillet until mixture heats to boiling. Mixture will thicken. Remove from heat; add cheese and basil. Stir with whisk until smooth. Stir in drained macaroni.

4 Serve with additional basil leaves if desired.

Mozzarella macaroni and cheese served with a caesar salad

It was very yummy; very rich and very creamy.  Definitely redolent of fettuccine alfredo and a completely different taste from your traditional macaroni and cheese.  Imagine fettuccine alfredo with macaroni noodles instead of fettuccine and you'll get the basic taste of this dish.  All in all, this is a recipe that I would make again.  I shall definitely have to experiment around with other cheeses for future macaroni and cheese recipes.....

Sunday, March 20, 2016

Crock pot chicken fricassee

     Chicken Fricassee is a dish that I have been wanting to try for years.  I had never heard of chicken fricassee (somehow it wasn't part of my childhood in LA) until I read A Breath of Snow and Ashes by Diana Gabaldon (one of my favorite authors [this book is part of her wonderful Outlander series]) and one of the characters were eating chicken fricassee.  It sounded really delicious, so I researched what it was and how to make it.  One of the many recipes for chicken fricassee I came across was actually inspired by A Breath of Snow and Ashes (and the Outlander series as a whole) from a blog called Outlander kitchen.  I read it and knew it was the recipe I had to try.


Chicken Fricassee. (Note: the sauce is not green, despite photographic evidence!)

Crock Pot Chicken Fricassee from Outlander Kitchen 

Ingredients:

Bone-in Chicken Thighs, rinsed and trimmed of extra fat and skin – 2 lbs (6-8 pieces)
All Purpose Flour – ¼ Cup
Salt – ½ tsp
Pepper – ¼ tsp
Olive Oil – 2 Tble
Butter – 2 Tble
Mushrooms, wiped clean, halved – ½ lb
Yellow Potatoes, trimmed, 2” pieces – 1 lb
Lemon Juice – 2 Tble
Small Onions (about 1” diameter), peeled – ¾ lb (or 1 large onion, julienned)
Carrots, peeled and cut into 4-6 pieces each – 2 medium
Garlic, papery skin removed  – 1 whole head
Butter – 2 Tble
Bay Leaves – 2
Fresh Thyme – 2 sprigs
Salt + Pepper – pinches
Chicken Stock – 1 Cup
White Wine – ½ Cup
Whipping Cream – ½ Cup
Egg Yolks – 2
Salt + Pepper – to taste
Serves: 4

Procedure:
Pat the chicken pieces dry.  Mix together the flour, salt and pepper in a small bowl.  Dredge the thighs in flour one at a time, shaking off the excess.
Heat a large heavy frying pan over medium-high.  Heat the olive oil and butter until bubbling and fry half of the chicken, skin side down, until light golden, about 3-4 minutes.  Flip and fry another 3 minutes on the second side.  Remove to the crock pot and repeat with the other half of the chicken.
Toss the mushrooms and potatoes with the lemon juice, then nestle them, along with the onions, carrots, garlic, butter, bay leaves and thyme in amongst the chicken pieces.  Season with salt and pepper, pour in the stock and wine, and rock the crock pot gently to settle and mix.
Cook on low for 4-6 hours.
Move the oven rack to the top position and preheat the oven to 300°.
When the chicken and vegetables are tender, turn off the crock pot.  Discard the garlic, bay leaves and thyme.  Use a slotted spoon to remove the chicken and vegetables to an oven-proof dish, and keep warm in the oven, uncovered, while you finish the sauce.
Strain the cooking liquid from the crock pot into a medium saucepan.  Use a spoon to skim the surface of fat, then reduce the liquid over medium-high heat until it measures about 1½ cups.  Reduce the heat to medium-low.
Beat together the egg yolks and cream.  Add 2-3 tablespoons of the hot cooking liquid into the cream mixture and stir well, then add the cream back into the saucepan and stir constantly until hot, and slightly thickened, about 5 minutes.  Season to taste and keep warm.
When the sauce is ready, turn the oven’s to broil to lightly brown and crisp the chicken’s skin, about 4 or 5 minutes.
Divide the chicken and vegetables on 4 plates and spoon over the sauce.
     The results?  Alas, not as stellar as I had hoped.  The chicken fricassee tasted good but was somehow both a bit too rich and a bit too bland for my taste buds.  I even skipped the last part about broiling the chicken as I had no large chicken pieces left to boil (they all just kind of melted into the ingredients).  Maybe six hours was too long to cook it?  Maybe I shouldn't have substituted russet potatoes for golden?  Oh well.  Still, I think chicken fricassee as a whole holds promise.  Maybe I'll get back to it eventually and try another recipe.  In the meanwhile, I shall continue to read my Outlander books and continue to enjoy this wonderful blog full of Outlander-inspired recipes.

    A note on the recipe:  I mentioned in my previous blog that I have recently bought an Instant Pot a seven-in-one programmable cooker.  An Instant pot combines a pressure cooker, a rice cooker, a slow cooker, a steamer, a food warmer, a saute pan and a yogurt maker.  Since I bought the instant pot, my husband and I have played around with the various features and have come to really love it.  What I liked about using the Instant pot for this particular recipe was that everything was cooked in one container.  I browned the chicken in the Instant pot using the saute feature, then put all the ingredients in and used it as a slow cooker and then finished off the sauce using the saute feature again.  What a wonderful invention!!  Expect to see more recipes from my fabulous Instant Pot...

Saturday, March 5, 2016

Pumpkin pie oatmeal

Pumpkin pie oatmeal.
     As you can imagine, I receive many food related e-mails.  I was perusing an e-mail from MyFitnessPal entitled "10 slow cooker breakfasts under 350 calories."  I've been trying to shed some pounds, use up all my old pumpkin related food items (I'm afraid I go rather crazy around fall pumpkin season) and use the slow cooker feature of a new cooking appliance I bought called an Instant Pot.  This recipe combined all three elements so I decided to try it out.

Pumpkin pie oatmeal from http://www.aroundmyfamilytable.com/pumpkin-pie-oatmeal/

Ingredients:
  • 1 1/2 cups steel cut oats
  • 4 1/2 cups water (depending on if you like thicker or thinner oatmeal)
  • 1 cup canned pumpkin puree (about half a can)
  • 2 tsps pure vanilla extract
  • 2 tsps pumpkin pie spice
  • 1/4- 1/2 cup brown sugar
Procedure:

  1. Combine all ingredients in slow cooker and cook on low for 6-8 hours. Stirring occasionally if you can.
  2. Season to taste with salt and/or more brown sugar.
  3. ©Around My Family Table

     My Instant Pot cooked it beautifully.  It looked and smelled wonderful.  The taste was, alas, just... so so.  It certainly didn't resemble pumpkin pie.  It just tasted blah.. overspiced even.  Like oatmeal and cinnamon but not sweet enough.  Even adding more brown sugar didn't really do much.  I felt like it was perhaps a bit heartier because of the pumpkin, and it did made a lot of oatmeal (I am still finishing it off almost two weeks later), but this is probably not a recipe that I will make again.  Oh well. I suppose not all recipes can be amazingly delicious.

Thursday, February 25, 2016

Homemade chicken soup from scratch

   Earlier this month, in the week leading up to the Super Bowl, both my husband and I were quite sick.  :-(  Poor Scotty caught the flu and I caught something that was a strange combination of both a cold and a flu.  Combined, we were two sick, miserable people sharing a small bed and probably getting each other even sicker.  What could possible cure our ills?  Homemade Chicken soup!
A wonderful bowl of homemade Chicken noodle soup
    How should I make a delicious health-giving soup?  First, let's start with the broth.  I wanted to make a bone broth, which is basically a chicken stock/broth that has been cooked so long that the nutrients from the bones leech into the liquid, creating a nutritious and delicious broth.  This seemed like just the kind of thing a sick person would need!  I used the same stock recipe that I have cooked before (see http://insearchoftheperfectmacaroniandcheese.blogspot.com/2011/01/homemade-chicken-stock.html) except this time I cooked it in my slow cooker for way way way longer.  I'm talking sixteen hours!  I started my broth the night before and had it cook until well into the afternoon.  By the end, the bones were literally dissolving into the soup.  The aroma made the house smell wonderful and the taste was divine!   Just one sip gave you energy and just felt nutritious.  I have tried making stock in the slow cooker before, but never for this long; I am definitely going to have to do this again.

All of the ingredients are in, ready to be turned into nourishing bone broth.
Same stock, sixteen hours later...
 Okay, so now I've got the broth, let's go onto the soup!
Here is what the finished soup looked like.

Homemade Chicken Soup from Scratch

Ingredients:


Homemade chicken (bone) broth

Chicken from bone broth, shredded
6 medium carrots, sliced
2 large onions, chopped
6 celery stalks, sliced
1 bag German egg pasta
Olive oil
Salt 
Pepper
Italian seasoning


Procedure:

1. Cut up onions, carrots and celery.
2. Heat up some olive oil in the bottom of a large pot (I used my dutch oven) and add in the vegetables until they are soft.
3.  Add bone broth, chicken and pasta.
4.  Cook the soup for ten to fifteen minutes or until all the ingredients are cooked to your liking.
5. Season with salt, pepper and Italian seasoning.
6. Enjoy!

  The soup was every bit as amazing as I hoped that it would be.  The broth was to die for, and the other ingredients just made you feel good.  This was exactly what Scott and I needed to help us through our sickness.  Plus, this made A LOT of food.  We had chicken soup for about a week straight and then froze the rest.  The only complaint that I had is that when I refrigerated the soup (with the noodles in it), the noodles absorbed all of the wonderful broth.  It turned from chicken soup to chicken casserole.  I suppose this just goes to show that it was real homemade soup.  If you decide to make this soup, I recommend keeping the noodles separate from the soup when you store it so you can continue to enjoy this wonderful, health-giving concoction!

Monday, January 25, 2016

Pupusas

     Last year, I discovered that delight of Salvadoran cuisine, pupusas.  These delightfully crispy, cheesy and savory creations tickled my taste buds (if you'll pardon the cliche) and I knew that I had to try to make them.  They couldn't be that hard, I thought.  However, between one thing and another, I delayed.  Not any longer!  Last night, I gathered up the guts (and the ingredients) and made fresh, homemade pupusas.
     I used a combination of recipes: one from a website I found on thekitchn.com, one from my cookbook (which I bought specifically for the pupusa recipe), lonely planet's The World's Best Street Food, where to find it & how to make it and a number of YouTube videos. 
     Note: Pupusas are traditionally served with a side of curtido, a lightly fermented vegetable mixture (kind of like sauerkraut).  I already had some at home as I had brought home pupusas for Scott this week.  Check out the kitchn website if you'd like to make your own.  They also have good pictures of the dough and an alternative way to fill your pupusa.

My homemade (imperfect, but still delicious) pupusas
Frying up the pupusas.  You can see the points where the cheese melted and crisped up.  Yum!


Pupusas (a combination of recipes from The World's Best Street Food and http://www.thekitchn.com/recipe-salvadoran-pupusas-con-curtidorecipes-from-the-kitchn-176284 and my own).

Ingredients:
2 cups masa harina
1 1/4 cup warm water
grated cheese (I used quesadilla)
green chile peppers, grated
curtido, if desired

Procedure:

1) Mix masa and warm water together until you get a dough that is the consistency of play dough.  Let the dough rest for ten minutes.
2) Shred the cheese and chop the green chiles.
3) Heat up a cast iron skillet over high heat.
4) Grab a handful of the dough (about the size of a golf ball or so) and flatten it out in between your two hands.  Make a little level in the dough and put some cheese and chiles in there.  Cup your hand and seal the end.  Flatten the pupusa again, this time with the filling inside.  Don't worry if you have some cracks.
5) Put the raw pupusas on the cast iron.  You can heat them in oil if you'd like or just on the skillet itself.  Leave on the skillet for five minutes or so, then flip.  Make sure both sides are crispy brown.
6) Serve with curtido and enjoy.

     The results?  Delicious, but I definitely still need to work on my technique!  There was not quite enough filling and I think my masa dough was a little too dry; the pupusas would crack and filling would spill out.  Fortunately, I read on one of the many recipes (alas, I forget which one) to not worry too much if this happened as any spilled cheese would just crisp up.  I decided to go for quesadilla cheese (labeled, literally, quesadilla).  This turned out to be the perfect choice as any spilled cheese just crisped up and became quite delicious.  In fact, it was so delicious that I tried cooking some on its own on the cast iron to try to make a cheese crisp.  Definitely recommended!  I forgot about the accompanying curtido until the very last batch, but found it was a welcome addition.  I think next time I am going to try to make my own curtido (future blog?); I can make sauerkraut, so why not?  I definitely still need to work on my technique and dough recipe a bit.  However, with such delicious results, how can I go wrong?

Tuesday, January 19, 2016

Bolognese sauce with homemade pasta


Beef Bolognese sauce with homemade pasta
      I have been dreaming of making Bolognese sauce ever since I first read about it in by go-to cookbook, Mark Bittman's How to Cook Everything.  It sounded amazing, but for some reason I never got around to cooking it.  Years later, I bought an Italian cookbook called The Essentials of Classic Italian Cuisine by Marcella Hazan, highly recommended by a fellow-foody and friend of mine, Rachel Harker.  Alas, this book also sat for months and months (are you sensing a theme here?), until the cold weather, full weekend and a desire to use my Le Creuset dutch oven again finally motivated me enough to go out and just do it!  The results were well worth the wait!

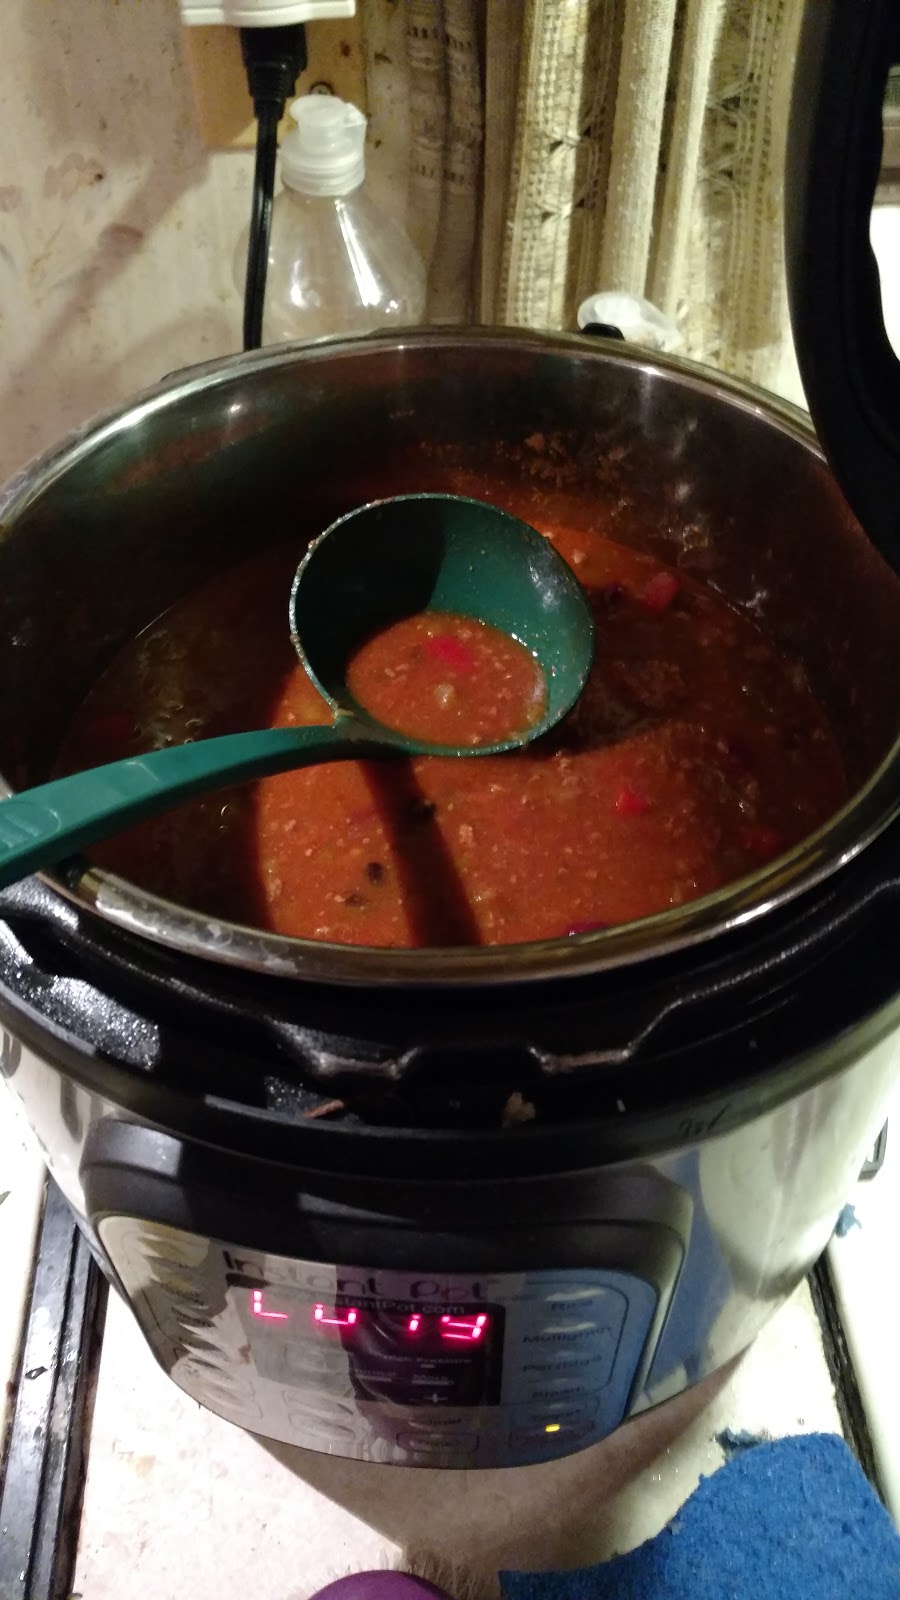
The finished Bolognese sauce.  Meaty, rich and delicious!
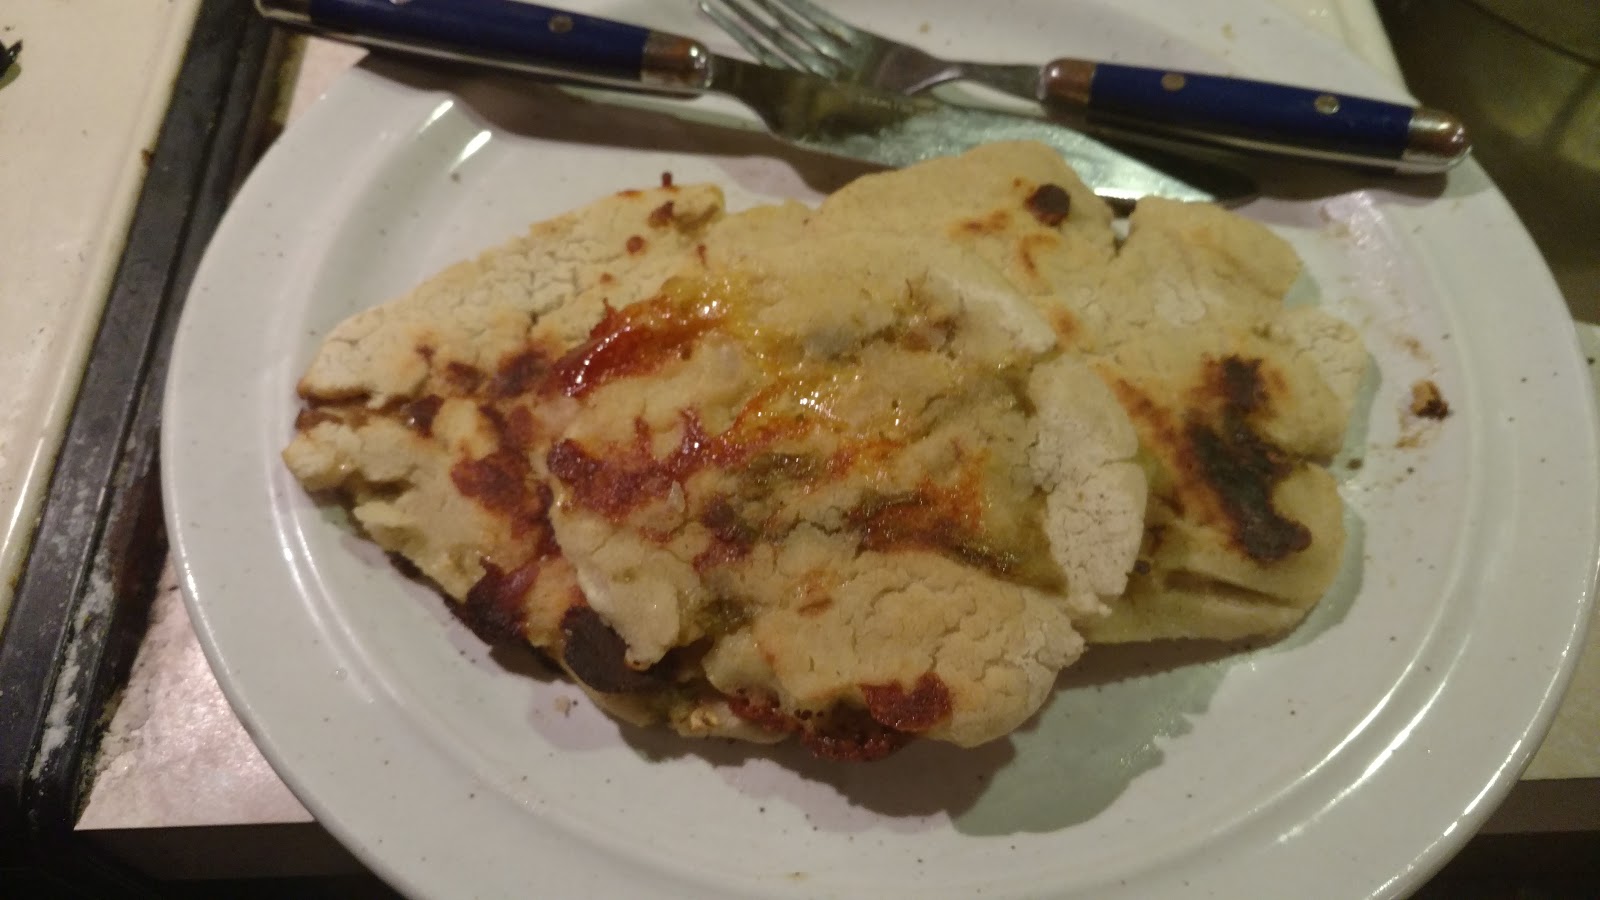
My homemade tagliatelle pasta was the perfect accompaniment for the sauce.

Bolognese meat sauce from The Essentials of Classic Italian cooking by Marcella Hazan

Notes:

Ragu, as the Bolognese call their celebrated meat sauce, is characterized by mellow, gentle, comfortable flavor that any cook can achieve by being careful about a few basic points:


  • The meat should not be from too lean a cut; the more marbled it is, the sweeter the ragu will be.  The most desirable cut of beef is the neck portion of the chuck.
  • Add salt immediately when sauteing the meat to extract its juices for the subsequent benefit of the sauce.
  • Cook the meat in milk before adding wine and tomatoes to protect it from the acidic bite of the latter.
  • Do not use a demiglace or other concentrates that tip the balance of flavors toward harshness.
  • Use a pot that retains heat.  Earthenware is preferred in Bologna and by most cooks in Emilia-Romagna, but enameled cast-iron pans or a pot whose heavy bottom is composed of layers of steel alloys are fully satisfactory.
  • Cook, uncovered, at the merest simmer for a long, long time; no less than 3 hours in necessary, more is better
Makes: 

2 heaping cups. for about 6 servings and 1 1/2 pounds pasta

Ingredients:

1 tbsp. vegetable oil
3 tbsp. butter plus 1 tbsp. for tossing the pasta
1/2 cup chopped onion
2/3 cup chopped celery
2/3 cup chopped carrot
3/4 lb. ground beef chuck (see prefatory note above)
salt
black pepper, ground fresh from the mill
1 cup whole milk
Whole nutmeg
1 cup dry white wine
1 1/2 cups canned imported Italian plum tomatoes, cut up, with their juice
1 1/4 to 1 1/2 pounds pasta
Freshly grated parmigiano-reggiano cheese at the table

Recommended Pasta:

There is no more perfect union in all gastronomy than the marriage of Bolognese ragu with homemade Bolognese tagliatelle.  Equally classic is Baked Green Lasgane with Meat Sauce, Bolognese Style.  Ragu is delicious with tortellini and irreproachable with such boxed dry pasta as rigatoni, conchiglie or fusilli.  Curiously, considering the popularity of the dish in the United Kingdom and the countries of the Commonwealth, meat sauce in Bologna is never served over spaghetti.

Procedure:

1) Put the oil, butter, and chopped onion in the pot, and turn the heat on to medium.  Cook and stir the onion until it has become translucent, then add the chopped celery and carrot.  Cook for about 2 minutes, stirring the vegetable to coat them well.
2) Add the ground beef, a large pinch of salt, and a few grinding of pepper.l  Crumble the meat with a fork, stir well, and cook until the beef has lots its raw, red color.
3) Add the milk and let it simmer gently, stirring frequently, until it has bubbled away completely.  Add a tiny grating,- about 1/8 teaspoon- of nutmeg, and stir.
4) Add the wine, let it summer until it has evaporated, then add the tomatoes and stir thoroughly to coat all ingredients well.  When the tomatoes begin to bubble, turn the heat down so that the sauce cooks at the laziest of simmers, with just an intermittent bubble breaking through to the surface.  Cook, uncovered, for 3 hours or more, stirring from time to time.  While the sauce is cooking, you are likely to find that it begins to dry and the fat separates from the meat.  To keep it from sticking, continue the cooking, adding 1/2 cup of water whenever necessary.  At the end, however, no water at all must be left an the fat must separate from the the sauce.  Taste and correct for salt.
5) Add the cooked drained pasta, adding the tablespoon of butter, and serve with freshly ground Parmesan on the side.

  The results?  Amazing and time-consuming!  This sauce takes an amazingly long time!  I started cooking at 11:30 a.m. and didn't have dinner until 6:45 p.m.  The sauce was cooking that whole time!  In addition to the pasta needing to simmer for three hours, it takes hours for all of the milk and all of the wine to cook off.  Also, once I added in the tomatoes, I couldn't quite get it at the perfect lazy simmer (the sauce would  wither bubble too violently or the flame would go out), but I did the best I could and it turned out great!  Considering, that the author said that there is no more perfect union in all gastronomy than the marriage of Bolognese ragu with homemade Bolognese tagliatelle, I knew I had to make fresh pasta to perfectly accompany this dish.  See my previous post about making ravioli for the fresh pasta at http://insearchoftheperfectmacaroniandcheese.blogspot.com/2011/02/fresh-pasta-aka-homemade-ravioli.html.  Only thing that changes is that instead of making ravioli, you simply roll the flattened pasta dough on itself and cut it into 1/4 inch strips to make extra-wide noodles.  This is most very definitely worth the extra effort; the pasta was cooked to perfection and matched beautifully with the sauce.  The sauce was rich, meaty, complex and absolutely amazing.  I served it with salad, bread and butter from the Parma region of Italy (I highly recommmend buying this butter if you ever find it; it is like eating sunshine on a field).  I will definitely be making this recipe again, especially for special celebrations!  I hope that you enjoy!


Monday, January 18, 2016

Vegetable Curry with Lamb

  After being MIA for all of 2015, I decided to take up blogging again.  Alas, I don't think I am going to be able to blog as much; a forty-hour work week on top of a three hour round trip commute really eats away at your cooking time!  However, I'd like to record at least some of the yummy things that I make!  Together, my husband and I made a New Year's resolution to eat more of a plant-based diet.  We have been trying to cook more at home to save our budget and our health!  I've been looking through my healthy cookbooks, especially The VB6 cookbook by Mark Bittman and came across this recipe.  I've always loved curries and I think you'll love it too!


Vegetable curry with lamb

Cooking in the pot.  Yum!


Vegetable Curry with Lamb from The VB6 Cookbook by Mark Bittman

Makes: 4 to 6 servings
Time: 1 to 2 hours, mostly unattended

Note: A classic curry- with lots of vegetables- is far simpler to make than you might think.  Just brown the meat; add the vegetables, stock, and aromatics; and let it simmer on the stove- it does its thing while you do yours.  This reheats beautifully too, making it the ideal meal for weeknight entertaining or freezing for ready-to-eat suppers on hectic nights.  Serve it with the bread on page 249 or brow rice (basmati is best here).

Ingredients:

2 tbsp. vegetable oil
1 lb. boneless lamb shoulder, cut into 1-inch chunks
1 tsp. salt
1/2 tsp pepper
1 large onion, halved and sliced
1 red bell pepper, chopped
1 zucchini, chopped
1 small head cauliflower (about 1 pound), chopped
1 tbsp. minced garlic
1 tbsp. minced fresh ginger, or 1 tsp ground dried
2 tbsp. curry powder
1/2 tsp cayenne (optional)
2 cups chicken or vegetable stock or water, or more as needed
1/2 cup Greek yogurt
1/2 cup chopped fresh cilantro leaves, for garnish

Procedure:

1) Put the oil in a large pot over medium-high heat.  When it's hot, add some of the lamb and sprinkle with some of the salt and pepper.  Cook, adjusting the heat and turning the pieces as needed so the meat doesn't burn, until it's well browned on all sides, 5 to 10 minutes.  As the meat browns, transfer it to a plate and continue adding more meat, seasoning it, and cooking the pieces until all the meat is browned.

2) Pour off all but 2 tablespoons of the fat and turn the heat down to medium.  Add the onion, bell pepper, zucchini, cauliflower, garlic, and ginger, and cook, stirring occasionally, until the vegetables being to soften, 5 to 10 minutes.  Add the curry powder and cayenne, if you're using it, and cooking, stirring constantly, until fragrant, 1 or 2 minutes.

3) Stir in the stock, scraping up any browned bits from the bottom of the pot, then add the browned lamb.  The meat and vegetables should be about halfway submerged in braising liquid, if not, add more liquid.  Bring to a boil, then lower the heat so the mixture barely bubbles.  Cover and cook, stirring every 30 minutes and adding small amounts of liquid if the stew ever looks dry, until the meat is tender enough to cut with a fork, another 15 to 30 minutes.

4) If the curry looks too watery, remove the lid, raise the heat a bit, and cook, stirring frequently, until it thickens.  If it looks too dry, add a little more stock or water and raise the heat until bubbly.  Remove from the heat.  Stir in the yogurt.  Taste and adjust the seasoning, then garnish with the cilantro and serve.

  Talk about eating the rainbow!  The vegetables alone are a colorful addition to this curry.  It was quite yummy and the lamb was delicious, but I would've wanted it maybe a tiny bit more creamy.  It is also a bit hard to tell from the recipe how long you should cook it; I ended up cooking it for about ninety minutes.  It was definitely worth it; yummy, healthy, spicy and went wonderfully with brown rice!