Saturday, March 23, 2013

Scott's Italian-Themed Birthday Dinner

     My husband is half Sicilian.  So, when I asked him what kind of food he wanted for his birthday dinner, he replied, after a moment's hesitation, Italian.  To satisfy his Italian needs, I came up with a delicious birthday menu: Caesar salad, Meat Lasagna, Garlic Bread and Tiramisu.  This meal required some advanced planning as I wanted to make as many items from scratch as I could (which, alas, could mean several days).  So, in order of preparation, here are the recipes:

Garlic Croutons from Mark Bittman's How to Cook Everything


Ingredients:

4 tbsp. extra-virgin olive oil, butter, or a combination
4 cloves garlic, peeled
4 to 6 slices any bread, cut into cubes if you like
salt to taste


Procedure:

1) Place the olive oil in a large skillet and turn the heat to medium-low heat.  Add the garlic and cook it in the oil, turning occasionally, until it is lightly browned.  Remove the garlic and reserve it for another use or toss it in a salad or soup; it will be very mild.


2) Turn the heat to medium and cook the bread in the oil, turning occasionally, until brown all over.  remove and sprinkle lightly with salt.  Store in a covered container at room temperature for up to a week.


Garlic croutons
     I've made these croutons several times before and they've come out deliciously.  This time, however, they tasted delicious but didn't quite have the right texture.  They were more crumby than crunchy, if that makes any sense.  Still good in a salad, but not quite the same as traditional croutons.  Perhaps it is because I used whole wheat bread?  Perhaps it was because the bread was not stale?  Maybe the fact that my stove doesn't get that hot made a difference?  Who knows... Anyways, I'd still use this recipe again because it has turned out perfectly for me every other time...

Sponge Cake from Mark Bittman's How to Cook Everything


Ingredients:

1 cup cake or all-purpose flour
1/4 tsp. salt
5 eggs, separated
1 cup sugar
2 tsp. grated or minced orange or lemon zest
1 tbsp. freshly squeezed lemon juice or 2 tbsp. freshly squeezed orange juice


Procedure:

1) Preheat the oven to 350 F.  Mix the flour and salt together.


2) Use an electric miser to beat the egg yolks until very thick and light, about 5 minutes.  Gradually add half the sugar and beat another 5 minutes or so.  The mixture should be thick and light-colored.  Beat in the zest and juice.


3) Beat the egg whites until they hold soft peaks; the tops of the whites should droop a little bit when you remove the beaters.  Gradually add the remaining sugar and continue to beat until the peaks become a little stiffer.


4) Use a rubber spatula or your hand to gently but thoroughly fold the egg whites into the yolk mixture. Stir the flour-salt mixture into this batter, a little at a time, gently but thoroughly folding it in after each addition.  Turn the batter into an un-greased 9 or 10 inch tube pan (not one with ridged sides) and bake 40 to 50 minutes, until the cake is firm, resilient, and nicely browned.


5) Invert the cake onto a rack and let cool thoroughly, about an hour.  Cut carefully around the sides of the cake and remove.  Cool completely before slicing and eat within a day.


Sponge cake still in part of the pan.  See how much the cake
encrusts the pan?  A pain in the butt to clean!
     I made the sponge cake for the tiramisu.  It was a bit difficult finding a tube pan (having never heard of one before this recipe!), but fortunately our neighbors/friends Jennifer and Martin had one that I could borrow.  The recipe itself came out delicious (I decided to go for the orange theme), but it didn't rise quite as much as I had expected it to.  Also, because the pan is un-greased, it stuck like crazy to the pan.  I wonder why Mark Bittman says to leave it un-greased?  Maybe the butter or oil or whatever you grease it with would interfere with the rising?


Caesar salad (Katie's recipe)

Ingredients:


romaine lettuce (I bought a bag that was already washed)
Caesar salad dressing (I used Brianna's homestyle Asiago Caesar dressing)
parmesan cheese, shredded
garlic croutons


Procedure:

1) Mix all ingredients in a bowl.  Serve.


    The salad was something I decided to make a little easier for myself by buying a good quality already made dressing rather than make my own salad dressing.  I tried making Caesar salad dressing once before and wasn't that impressed with my results.  I'll probably try again at some point, but I already had so much to make I figured I'd take this one short cut.


Caesar salad
World's Best Lasagna from http://allrecipes.com/Recipe/Worlds-Best-Lasagna/Detail.aspx
 
INGREDIENTS:
1 pound sweet Italian sausage
3/4 pound lean ground beef
1/2 cup minced onion
2 cloves garlic, crushed
1 (28 ounce) can crushed tomatoes
2 (6 ounce) cans tomato paste
2 (6.5 ounce) cans canned tomato sauce
1/2 cup water
2 tablespoons white sugar
1 1/2 teaspoons dried basil leaves
1/2 teaspoon fennel seeds
1 teaspoon Italian seasoning
1 tablespoon salt
1/4 teaspoon ground black pepper
4 tablespoons chopped fresh parsley
12 lasagna noodles
16 ounces ricotta cheese
1 egg
1/2 teaspoon salt
3/4 pound mozzarella cheese, sliced
3/4 cup grated Parmesan cheese


DIRECTIONS:

1.In a Dutch oven, cook sausage, ground beef, onion, and garlic over medium heat until well browned. Stir in crushed tomatoes, tomato paste, tomato sauce, and water. Season with sugar, basil, fennel seeds, Italian seasoning, 1 tablespoon salt, pepper, and 2 tablespoons parsley. Simmer, covered, for about 1 1/2 hours, stirring occasionally.
2.Bring a large pot of lightly salted water to a boil. Cook lasagna noodles in boiling water for 8 to 10 minutes. Drain noodles, and rinse with cold water. In a mixing bowl, combine ricotta cheese with egg, remaining parsley, and 1/2 teaspoon salt.
3.Preheat oven to 375 degrees F (190 degrees C).
4.To assemble, spread 1 1/2 cups of meat sauce in the bottom of a 9x13 inch baking dish. Arrange 6 noodles lengthwise over meat sauce. Spread with one half of the ricotta cheese mixture. Top with a third of mozzarella cheese slices. Spoon 1 1/2 cups meat sauce over mozzarella, and sprinkle with 1/4 cup Parmesan cheese. Repeat layers, and top with remaining mozzarella and Parmesan cheese. Cover with foil: to prevent sticking, either spray foil with cooking spray, or make sure the foil does not touch the cheese.
5.Bake in preheated oven for 25 minutes. Remove foil, and bake an additional 25 minutes. Cool for 15 minutes before serving.

The amazing tomato sauce
"World's best" lasagna

Piece of lasagna
     This lasagna really is worth the extra time to make it.  The most incredible thing about it is the sauce: meaty, rich-flavored, "tomatoey" with just the right amount of spices.  Amazing!  I cooked the sauce the night before and then made the lasagna on the day of his birthday.  When Scott and I smelled the sauce cooking (and then tasted the final product), it was all we could do not to eat the whole thing then and there!  This recipe calls for less cheese than I normally use in lasagna recipes.  It was okay with the parmesan and ricotta (in fact, I didn't even measure the parmesan), but I ran out of mozzarella fast.  I've never used sliced mozzarella either, but it surprisingly works in the recipe.  It has the lovely effect of leaving gooey melty parts of cheese in lasagna that stretch on the way to your mouth.  I did like the addition of the egg to the ricotta cheese; it made it a lot easier to spread!
     I think this was definitely the best lasagna I've made.  It is delicious and filling and we had leftovers for like a week afterwords!


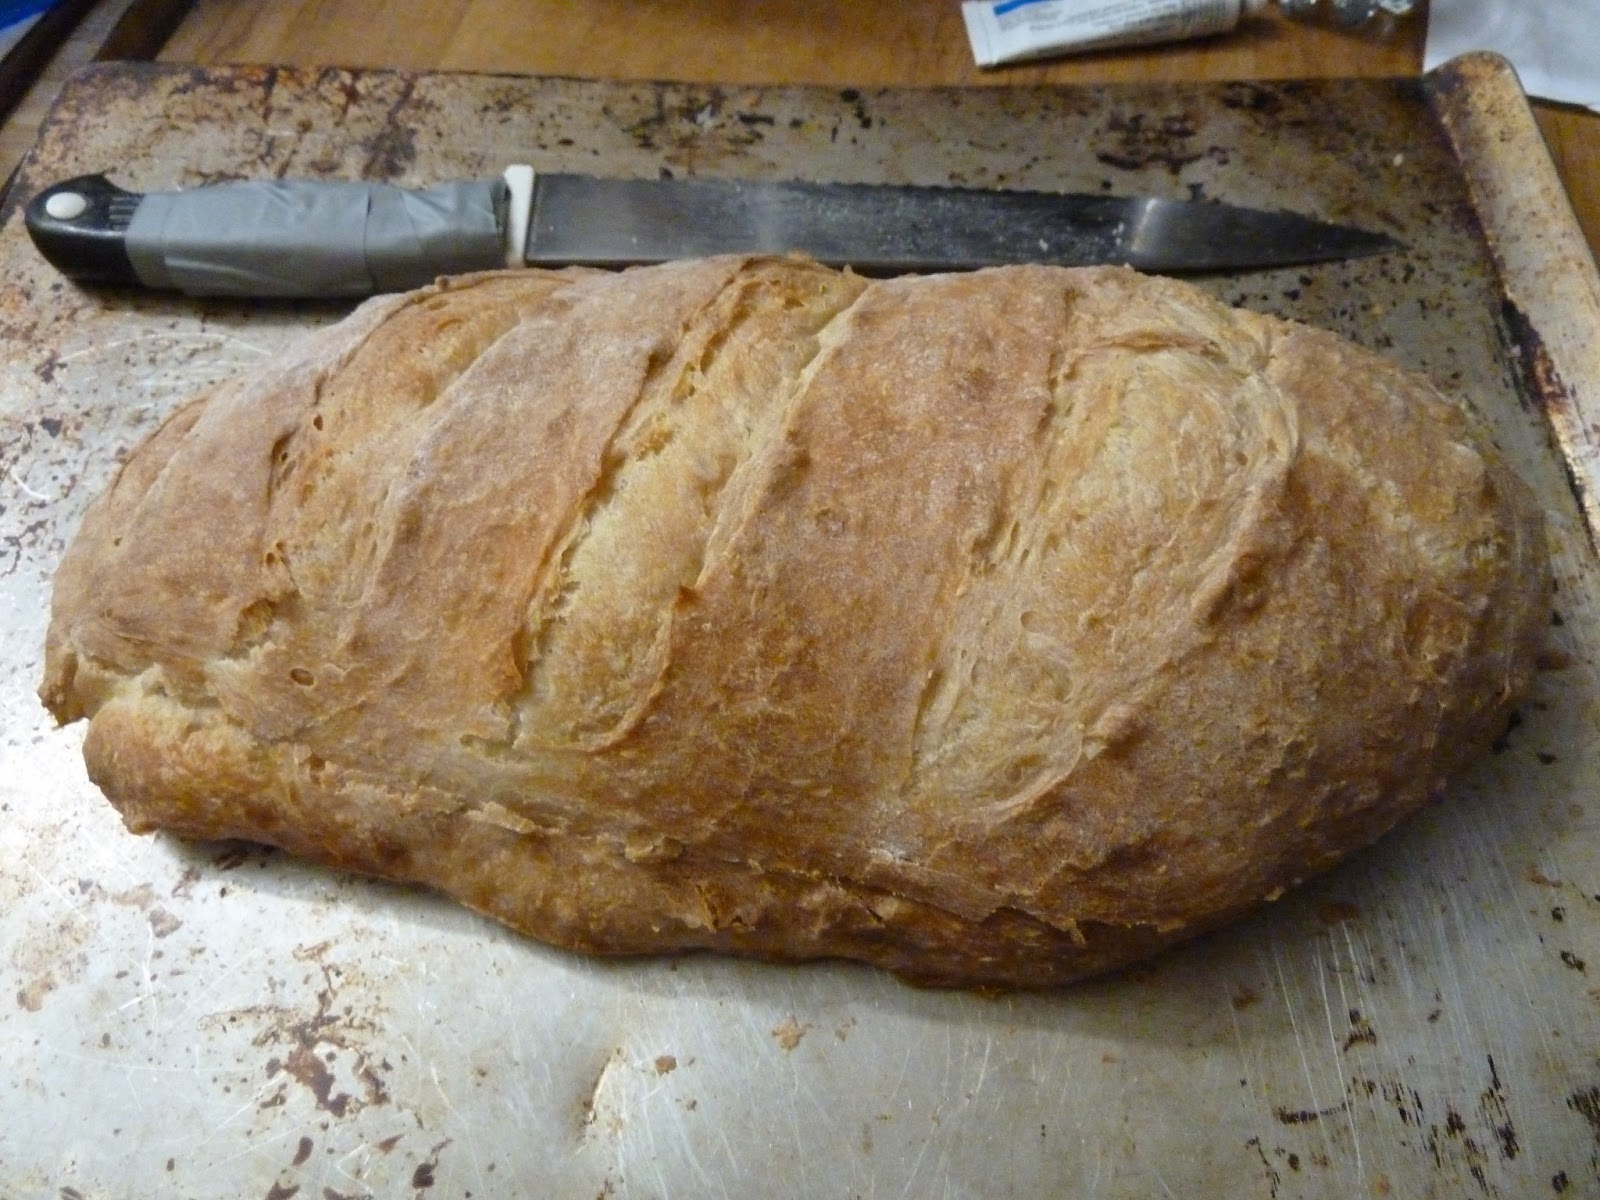
Roasted Garlic Bread from http://allrecipes.com/Recipe/Roasted-Garlic-Bread/Detail.aspx

INGREDIENTS:
3 bulbs garlic
2 tablespoons olive oil
1 (1 pound) loaf Italian bread
1/2 cup butter
1 tablespoon chopped fresh parsley
(optional)
2 tablespoons grated Parmesan cheese
(optional)


DIRECTIONS:
1.Preheat the oven to 350 degrees F (175 degrees C). Slice the tops off of the garlic bulbs so that the tip of each clove is exposed. Place the bulbs on a baking sheet, and drizzle with olive oil. Bake for 30 minutes, or until garlic is soft.
2.Set the oven to broil. Slice the loaf of bread in half horizontally, and place cut side up on a baking sheet.
3.Squeeze the cloves of garlic from their skins into a medium bowl. Stir in the butter, parsley, and Parmesan cheese until well blended. Spread onto the cut sides of the bread.
4.Broil for about 5 minutes, until toasted.
French bread for the garlic bread
My tragically burnt garlic bread
    In order to make the garlic bread, I baked a large loaf of french bread (see http://insearchoftheperfectmacaroniandcheese.blogspot.com/2011/01/dinner-for-game-night.html for the recipe).  I made the dough the night before, and baked the bread the day of his birthday.  This recipe came out delicious except for one (not so minor) problem: I burnt it!  Ack!  I left it in the broiler for the five minutes that the recipe recommends only to find out that that was one or two minutes too many.  It came out all blackened, and there wasn't much that we could do to remove the burnt part.  The few parts that weren't burnt were amazing but the rest had kind of a burnt taste to it.  Tragedy!  ::sigh::  I guess this happens to every chef once in a while.  I would definitely make this recipe again, but this time I would really watch it in the broiler!


Tiramisu 
from Mark Bittman's How to Cook Everything

Ingredients:

1/2 cup sugar
1 1/2 tbsp. cornstarch
pinch salt
2 cups milk
3 eggs
1 tbsp. unsalted butter
1 tsp. vanilla extract
about 2 cups broken or torn-up leftover sponge cake, or any yellow cake, lady fingers, or even biscotti
1 cup strong cold coffee, preferably espresso
unsweetened cocoa powder as needed

Procedure:

1) In a small saucepan, combine the sugar with the cornstarch and salt.  mix together the milk and eggs.  Stir the milk-egg mixture into the sugar-cornstarch mixture over medium heat; at first, whisk occasionally to eliminate lumps.  Then stir almost constantly until the mixture boils and thickens, about 10 minutes.  Stir in the butter and vanilla extract.  Cool, then lay plastic wrap onto the surface of the custard and refrigerate for at least 1 hour.

2) When the custard is cool, prepare the cake (or cookies) by dividing half of it among four dessert bowls.  Sprinkle with about half the espresso and dust with a little cocoa powder.  Spoon half the custard over it. 

3) Top with the remaining cake, then repeat the process,finishing with a dusting of cocoa powder.  Chill until set, at least 1 hour (and probably longer) and serve cold.  This keeps well for a day or more, covered and refrigerated.

Tiramisu.  Don't make it in a loaf pan

Pretty good, but not the greatest


     I first made this recipe many many years ago with my then-boyfriend when I was first learning how to cook. I remembered liking it very much and being impressed with how it came out.  I was complimented on my custard's professional taste and appearance.  I was amazed at using cocoa powder and cornstarch for the first time.  What were these ingredients?  I remembered going to Starbucks to get a cup of espresso and the weird looks the staff game me.  With all these fond memories, I knew I wanted to make this recipe again.
     I wish I could say that it lived up to the memories, but, alas, I cannot.  Don't get me wrong: it was good.  But it wasn't the great thing that I had remembered it being.  To start off with, I wasn't the biggest fan of my homemade sponge cake in the tiramisu.  It wasn't layered evenly and the espresso didn't soak through evenly which meant that I had layers that tasted like orange sponge cake and not much else.  On the flip side, I had layers that tasted far too strongly of coffee.  I think lady fingers would be a better choice.  The custard was good on its own, but not quite flavorful enough to match up again the strong-flavored espresso.  Plus, I wasn't sure which pan to make the dessert in so I used a loaf pan which really wasn't the best.  Things didn't spread out as evenly as I would have liked.  I think I will definitely make tiramisu again in my life.  But next time I make it, I'm going to make a more traditional recipe using marscapone cheese.  I bet you that would be amazing!

Our Italian dinner

    Even though I bought some rather expensive ingredients (high-quality organic meat and milk, for example), it is still amazing to me how much cheaper it is to cook at home.  I spent a lot of money on groceries (about the same as I would have spent in an Italian restaurant), but I had leftovers that lasted me a week or more.  Plus, most of what I made was probably as good as if not better than what you get in a restaurant.  Best of all, I knew exactly what I was putting into my body.  I sure do count my blessings that I have the ability and the passion to cook.  It's really not that hard once you get used to it, and the results are delicious!


Thursday, March 7, 2013

Chipotle-themed food

     I've discovered a new love in my life; chipotle peppers (and no, I'm not talking about the restaurant!).  It all started when I had one of those moments at the grocery store (although it could also happen at a deli, restaurant or any other place where they serve food) where I looked at something and thought "I could make that at home for way cheaper."  I think it happens to every cook once they get comfortable with cooking and want to explore more.  The item in question was Chipotle macaroni salad sold at New Leaf (a local health food store).  Scott and I have ordered this deli item before and absolutely loved it.  However, it is uber expensive!  Scott remembers it being something like $8.49 a pound.  Which means that if you buy anything remotely resembling a satisfying amount for two people you are paying like $10 or more!  For macaroni salad, for goodness sakes!  So, I wrote down the ingredients and decided to try to make it at home.  Doing a little research, I found a very similar recipe online and used it as a guide.  I'll re-print that recipe here, and tell you what changes I made.

Chipotle Macaroni Salad from http://www.food.com/recipe/vegan-chipotle-pasta-salad-363696

Ingredients:

8 ounces ziti pasta

3/4 cup vegan mayonnaise

4 chipotle peppers with adobo sauce

1/2 cut thinly sliced red bell pepper

1/2 cup chopped celery

1/4 cup green onion

1/4 cup cilantro

1 large garlic clove, minced

2 teaspoons vegetable oil

1 teaspoon cumin

lime zest

1 tablespoon lime juice

1 teaspoon ground black pepper

Procedure:

1. Boil pasta according to directions and rinse with cold water after it has cooked.

2. In a small skillet on medium low heat saute garlic and red bell pepper and 2 tsp oil until peppers are slightly softened and garlic is aromatic; remove from heat.

3. Put chipotle peppers and adobo sauce in food processor and pulse until it becomes like a paste and there are no large chunks.

4. Chop celery, green onions, and cilantro.

5. Combine all the ingredients in a large bowl with the Veganaise.

6. Stir and add salt to taste.

7. Add additional peppers if you like more heat.

     So, here's what I did differently:  First of all, I used whole wheat macaroni pasta instead of ziti.  I also used a whole box (13.25 oz I believe) so upped all the rest of the ingredients.  I used regular mayonnaise, as that was what I had in the house.  Besides which, I don't really like the taste of vegenaise (vegan mayonnaise).  I guestimated on the rest of the ingredients and chopped them up in the food processor.  I remember using a whole red bell pepper, 6 chipotle peppers, about 2 stalks or so of celery, the top 3" or so from the cilantro and the green onions, all the lime juice and zest from one lime and whatever amount of mayo that made the recipe come together.  It was amazing!.  I must've been particularly ADD when I made this because I forgot to add in both the lime zest and juice and cumin!  I caught the lime zest/juice mistake before I served but, but realized the next day that I had forgotten the cumin.  We had the cumin with seconds.  I suppose this goes to show you that neither of those ingredients are absolutely necessary although they definitely add to the taste (especially the cumin!).  The whole salad came out just like the store-made version.  And so much cheaper!
Chipotle macaroni salad


     After making the chipotle macaroni salad, I had some leftover chipotle peppers and adobo sauce.  I wanted to tasted that deliciousness again!  I remembered that Mark Bittman really liked chipotle peppers in his Food Matters cookbooks, so I perused through them. And, what do you know, I found a recipe I had been wanting to try for months but never had chipotle peppers for: Chipotle Quinoa with Corn and Black Beans.

Chipotle Quinoa with Corn and Black Beans from Mark Bittman's The Food Matters Cookbook


Ingredients:


3 tbsp. olive oil

1 onion, chopped

1 tbsp. minced garlic

2 (or more) canned chipotle chiles, minced, with some of their adobo sauce

1 tbsp. chopped fresh oregano, or 1 tsp. dried

3/4 cup quinoa, rinsed and drained

salt and black pepper

1 cup cooked or canned black beans, drained

1/2 cup corn kernels (frozen are fine)

1 1/2 cups vegetable stock, beer, or water

Lime wedges


Procedure:


1) Put the oil in a large skillet over medium heat.  When it's hot, add the onion and garlic and cook, stirring, until the onion is soft, about 5 minutes.  Add the chipotles and adobo (use almost none to a lot, depending on how hot you want the finished dish) and oregano and continue stirring for about 1 minute.


2) Turn the heat up to medium-high, add the quinoa, and sprinkle with salt and pepper.  Continue to cook, stirring frequently, for 3 to 5 minutes.  Add the beans,corn, stock, and some salt and pepper and bring to a boil.  Stir, cover, and reduce the heat to low.  Cook, undisturbed, for 15 minutes.


3) Uncover and test the quinoa for doneness.  if the kernels are still crunchy, make sure there's enough liquid to keep the bottom of the pan moist; cover and cook for another 5 minutes or so.  When they're tender, taste and adjust the seasoning.  Serve warm or at room temperature with lime wedges.

Chipotle quinoa with corn and black beans

     Deliciousness!  Definitely a dish I will be making again.  Making this dish, I've come to realize that I get lazy about measuring ingredients when I don't think that I really have to.  For this particular recipe, I used a whole can of beans and a whole can of corn because it was a lot easier than measuring out the amounts.  Besides which, I made this recipe to use up a leftover ingredient (the chipotle peppers) and did not want more leftover ingredients (corn and beans).  Because of this, I upped the quinoa to 1 cup and used 2 cups of stock (chicken- because that was what I had in the house).  As a variation, I think it would've been awesome with some cilantro and chicken as well.  Yum!       Now that my eyes have been opened to the deliciousness of chipotle peppers, I think I am definitely going to start using them more often!  Prepare for future chipotle-themed foods!

Wednesday, March 6, 2013

Beet chips... which really turned into potato chips

     I love Wednesdays.  Wednesday is when the Food and Wine section in our local newspaper, The Santa Cruz Sentinel comes out.  On Wednesday, February 19th, the SC Sentinel had an article on how to make beet chips.  Having read about beet chips in other cookbooks, I decided to try to make it and went out and bought a bunch of golden beets.  As it turns out, New Leaf only had tiny golden beet bunches, so I sliced some potatoes and put those in there as well.


Jenn Lynne of Happy Boy Farms in Freedom says her recipe for beet chips isn't exact but pledges it's a good one. 

Bunch of fresh beets
Olive oil
Sea salt

1. Preheat over to 425 degrees.
2. Thinly slice your beets, toss in olive oil and sea salt and spread on a rimmed baking sheet.
2. Cook until they begin to burn on the edges, which makes for a better end texture, 15 to 20 minutes. Watch closely. You can remove chips as they become lightened in color. Transfer to a wire rack; chips will crisp up as they cool.

Mostly potato chips

Close up of potato chips
     Anyways, these tasted quite good but (except for a few) weren't really crunchy.  More like roasted potatoes/beets than chips.  I think I should have just left them in for longer, but knowing the funkiness of my oven I just removed them before they all burned to a crisp.  Try it at home and let me know if it comes out any better for you.

Monday, March 4, 2013

Coconut Flapjacks

     I had leftover toasted coconut, coconut milk and coconut topping from the sticky rice with mango recipe.  Then I had a brilliant idea: why not make coconut pancakes and use the coconut topping on the top instead of syrup?  Looking around in my cookbooks, I found a recipe for Coconut Flapjacks from Mark Bittman's Food Matters.  Well, why not?

Coconut Flapjacks from Mark Bittman's The Food Matters Cookbook

Notes from the author: "Coconut and its milk provide so much richness that you can make these pancakes without any eggs or dairy at all.  Fresh or dried fruit is a great topping here, but I like the slight crunch of sugar crystals combined with a few drops of lime juice.  Or if you want to take these the savory route, add a tablespoon of curry powder to the batter"

Ingredients: 

2 1/2 cups whole wheat flour
1 cup shredded, unsweetened coconut
1/2 tsp salt
One 14 oz can coconut milk (light is fine)
1 1/4 cups warm water, or more as needed
Vegetable oil, for frying
Raw (turbinado) sugar, for serving
Lime wedges, optional

Procedure:

1) Heat the oven to 200 F.  Combine the flour, coconut, and salt in a large bowl.  Stir in the coconut milk and warm water.  The batter should be fairly thin but not watery; add a little more water if it seems to thick.

2) Put a large skillet or griddle over medium heat.  When a few drops of water dance on its surface, add a thin film of vegetable oil and let it get hot.  Working in batches, spoon the batter onto the griddle or skillet, making any size pancakes you like.  Cook until bubbles form on the top and pop, 2 to 3 minutes; you may have to rotate the cakes to cook them evenly, depending on your heat source and pan.  Flip the flapjacks and cook until they're browned on the other side, a minute or 2 more.  As they finish, transfer them to a platter in the oven while you cook the remaining batter.  While they're hot, sprinkle the tops with a little sugar and serve with lime wedges.

     These made a really dense pancake that surprisingly fills one up quickly.  Of course, I didn't do the keep them warm in the oven or top with turbinado sugar and serve with lime wedges.  Instead, I just put them on a plate (they kept warm enough) and topped with the coconut topping and, eventually, the toasted coconut (I forgot about the toasted coconut the first time I served them).  Very good.  Filling.  And pretty darn healthy for you!

Coconut Flapjacks

With the coconut topping leftover from Sticky rice with mango

Look, it made a heart!

Rocky Road Cookies

     Funny how I always seem to be behind on my blogging.  I made these cookies for the first time a week or so ago and then made them again (out of the same dough) a few days ago.  They are delicious!  I receive many (too many, honestly) e-mails and magazines about food.  This recipe came from one of the many food e-mails.  Since it sounded pretty delicious, I decided to check it out.  I was quite pleased to discover that it was dairy-free.  I just had to try it.

Ooey Gooey Rocky Road Cookies from http://thegingersnapgirl.blogspot.ca/2012/03/ooey-gooey-rocky-road-cookies_19.html and http://www.fifteenspatulas.com/ooey-gooey-rocky-road-cookies/
from Fifteen Spatulas

Makes 24 cookies

Ingredients:
3 cups powdered sugar
2/3 cup cocoa powder
1/4 teaspoon salt
3 extra large egg whites
1 tablespoon vanilla extract
2 cups semi-sweet chocolate chips
2.5 ounces chopped or slivered, toasted, almonds (to toast almonds, heat oven to 350 and place almonds on foil lined baking sheet and bake until golden, about 10 minutes)
1 cup mini marshmallows

Preheat oven to 350 degrees and line 2 baking sheets with parchment paper.  In a large bowl sift powdered sugar and cocoa powder.  Whisk in salt.  Add egg whites and vanilla and whisk until combined and batter is smooth.  Stir in chocolate chips and almonds.  *Chill batter in refrigerator for 1 hour to help prevent spreading in the oven.  Using a medium size cookie scoop, portion out 12 cookies on each baking sheet.  Place 4-5 marshmallows on top of each cookie.  Place the baking sheets in the freezer for 5 minutes (or fridge for 10-15 minutes) to chill cookies to prevent them from spreading too much in the oven.  Bake cookies for 12-13 minutes.  Allow to cool on the baking sheets for at least 5 minutes and then transfer cookies to wire rack to finish cooling.  


     These cookies are heavenly and naturally gluten & dairy-free.  I would definitely recommend looking at both of the sources as there are some differences between them.  For example, the ginger snap girl says to use chopped or slivered almonds while fifteen spatula says that you can use sliced almonds.  I wish I had read both as I went out of the way to buy slivered almonds when I could have bought sliced almonds.  They also differ slightly in what and when they tell you to refrigerate.  The above recipe says to refrigerate the batter before and after you put it onto baking sheets.  The fifteen spatula one says to pop it in the freezer for five minutes before you bake it.  To be honest, I didn't even bother with all of that refrigerating.  For one thing, I simply don't have enough room in my fridge.  For another thing, I wanted them now and didn't want to wait all that time for them to get cold.  It didn't make that much of a difference, as far as I could see.  The first time I made them, they were under-cooked after 12-13 minutes so I put them on for a few more minutes.  Alas, when the dough seemed cooked the marshmallows were toasted.  The second time I made them (I had leftover dough from the first batch), the consistency of the batter was a bit weird after days in the fridge so I just made one big cookie. However, this time I pulled them out earlier so the marshmallows had a better consistency.  Either way about it, these are ooey and gooey and definitely chocolately.  Almost a bit too chocolatey for my taste, not being a big fan of uber-chocolate things (e.g., chocolate ice cream or chocolate cake).  But, if you like a lot of chocolate, make these cookies.  Scott loved them!

Pre-baking

Out of the oven

A close up of toasted marshmallow goodness