Monday, January 25, 2016

Pupusas

     Last year, I discovered that delight of Salvadoran cuisine, pupusas.  These delightfully crispy, cheesy and savory creations tickled my taste buds (if you'll pardon the cliche) and I knew that I had to try to make them.  They couldn't be that hard, I thought.  However, between one thing and another, I delayed.  Not any longer!  Last night, I gathered up the guts (and the ingredients) and made fresh, homemade pupusas.
     I used a combination of recipes: one from a website I found on thekitchn.com, one from my cookbook (which I bought specifically for the pupusa recipe), lonely planet's The World's Best Street Food, where to find it & how to make it and a number of YouTube videos. 
     Note: Pupusas are traditionally served with a side of curtido, a lightly fermented vegetable mixture (kind of like sauerkraut).  I already had some at home as I had brought home pupusas for Scott this week.  Check out the kitchn website if you'd like to make your own.  They also have good pictures of the dough and an alternative way to fill your pupusa.

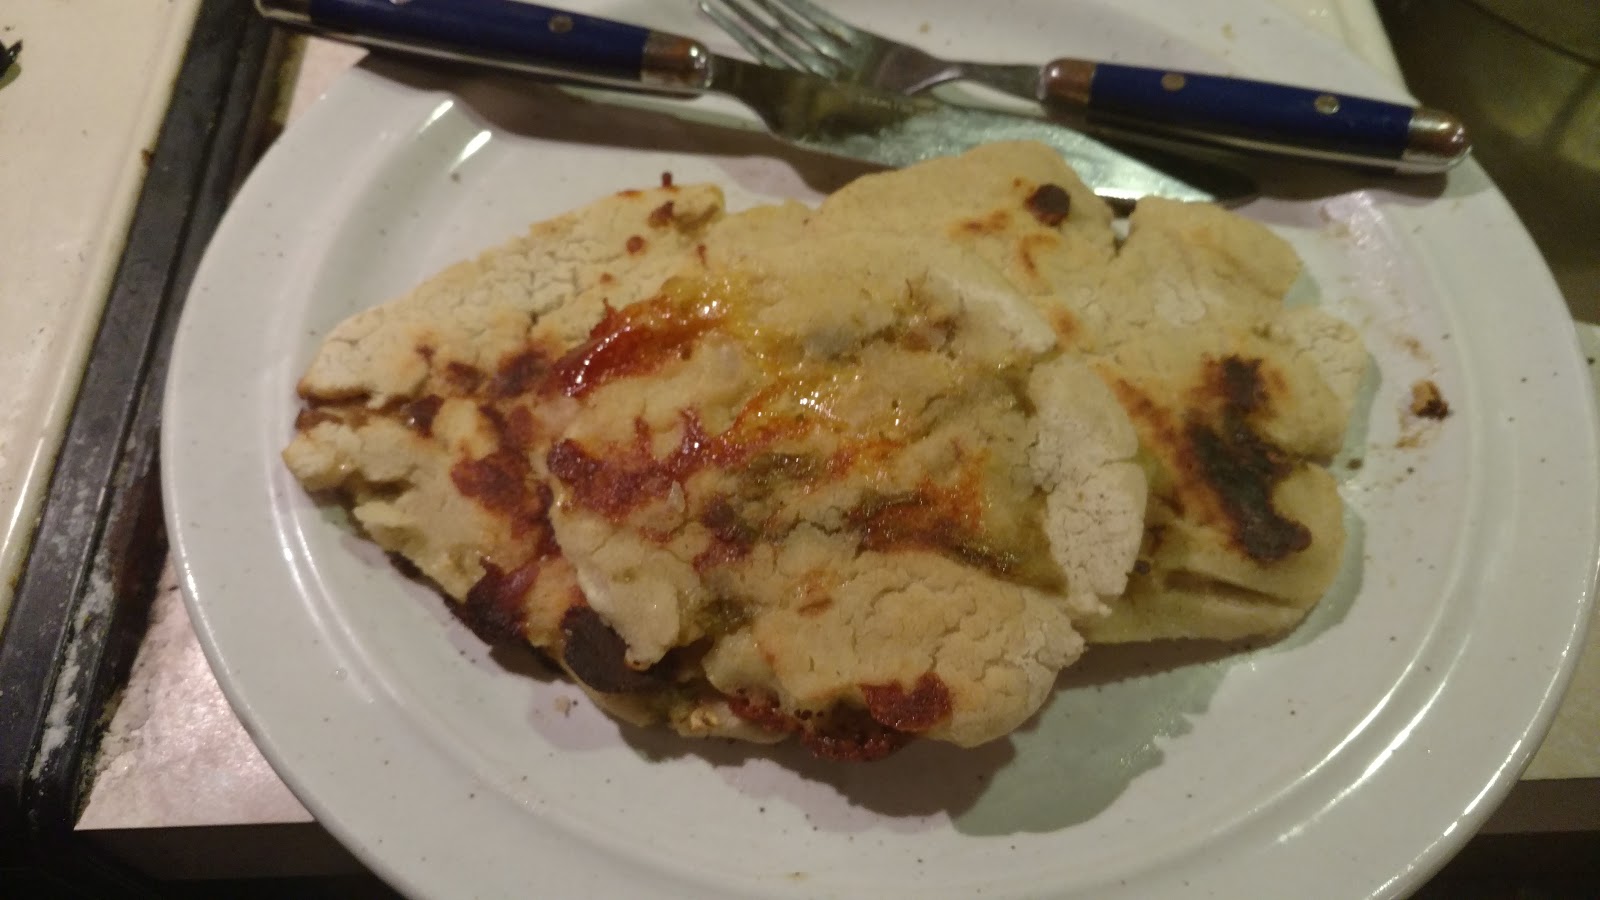
My homemade (imperfect, but still delicious) pupusas
Frying up the pupusas.  You can see the points where the cheese melted and crisped up.  Yum!


Pupusas (a combination of recipes from The World's Best Street Food and http://www.thekitchn.com/recipe-salvadoran-pupusas-con-curtidorecipes-from-the-kitchn-176284 and my own).

Ingredients:
2 cups masa harina
1 1/4 cup warm water
grated cheese (I used quesadilla)
green chile peppers, grated
curtido, if desired

Procedure:

1) Mix masa and warm water together until you get a dough that is the consistency of play dough.  Let the dough rest for ten minutes.
2) Shred the cheese and chop the green chiles.
3) Heat up a cast iron skillet over high heat.
4) Grab a handful of the dough (about the size of a golf ball or so) and flatten it out in between your two hands.  Make a little level in the dough and put some cheese and chiles in there.  Cup your hand and seal the end.  Flatten the pupusa again, this time with the filling inside.  Don't worry if you have some cracks.
5) Put the raw pupusas on the cast iron.  You can heat them in oil if you'd like or just on the skillet itself.  Leave on the skillet for five minutes or so, then flip.  Make sure both sides are crispy brown.
6) Serve with curtido and enjoy.

     The results?  Delicious, but I definitely still need to work on my technique!  There was not quite enough filling and I think my masa dough was a little too dry; the pupusas would crack and filling would spill out.  Fortunately, I read on one of the many recipes (alas, I forget which one) to not worry too much if this happened as any spilled cheese would just crisp up.  I decided to go for quesadilla cheese (labeled, literally, quesadilla).  This turned out to be the perfect choice as any spilled cheese just crisped up and became quite delicious.  In fact, it was so delicious that I tried cooking some on its own on the cast iron to try to make a cheese crisp.  Definitely recommended!  I forgot about the accompanying curtido until the very last batch, but found it was a welcome addition.  I think next time I am going to try to make my own curtido (future blog?); I can make sauerkraut, so why not?  I definitely still need to work on my technique and dough recipe a bit.  However, with such delicious results, how can I go wrong?

Tuesday, January 19, 2016

Bolognese sauce with homemade pasta


Beef Bolognese sauce with homemade pasta
      I have been dreaming of making Bolognese sauce ever since I first read about it in by go-to cookbook, Mark Bittman's How to Cook Everything.  It sounded amazing, but for some reason I never got around to cooking it.  Years later, I bought an Italian cookbook called The Essentials of Classic Italian Cuisine by Marcella Hazan, highly recommended by a fellow-foody and friend of mine, Rachel Harker.  Alas, this book also sat for months and months (are you sensing a theme here?), until the cold weather, full weekend and a desire to use my Le Creuset dutch oven again finally motivated me enough to go out and just do it!  The results were well worth the wait!

The finished Bolognese sauce.  Meaty, rich and delicious!
My homemade tagliatelle pasta was the perfect accompaniment for the sauce.

Bolognese meat sauce from The Essentials of Classic Italian cooking by Marcella Hazan

Notes:

Ragu, as the Bolognese call their celebrated meat sauce, is characterized by mellow, gentle, comfortable flavor that any cook can achieve by being careful about a few basic points:


  • The meat should not be from too lean a cut; the more marbled it is, the sweeter the ragu will be.  The most desirable cut of beef is the neck portion of the chuck.
  • Add salt immediately when sauteing the meat to extract its juices for the subsequent benefit of the sauce.
  • Cook the meat in milk before adding wine and tomatoes to protect it from the acidic bite of the latter.
  • Do not use a demiglace or other concentrates that tip the balance of flavors toward harshness.
  • Use a pot that retains heat.  Earthenware is preferred in Bologna and by most cooks in Emilia-Romagna, but enameled cast-iron pans or a pot whose heavy bottom is composed of layers of steel alloys are fully satisfactory.
  • Cook, uncovered, at the merest simmer for a long, long time; no less than 3 hours in necessary, more is better
Makes: 

2 heaping cups. for about 6 servings and 1 1/2 pounds pasta

Ingredients:

1 tbsp. vegetable oil
3 tbsp. butter plus 1 tbsp. for tossing the pasta
1/2 cup chopped onion
2/3 cup chopped celery
2/3 cup chopped carrot
3/4 lb. ground beef chuck (see prefatory note above)
salt
black pepper, ground fresh from the mill
1 cup whole milk
Whole nutmeg
1 cup dry white wine
1 1/2 cups canned imported Italian plum tomatoes, cut up, with their juice
1 1/4 to 1 1/2 pounds pasta
Freshly grated parmigiano-reggiano cheese at the table

Recommended Pasta:

There is no more perfect union in all gastronomy than the marriage of Bolognese ragu with homemade Bolognese tagliatelle.  Equally classic is Baked Green Lasgane with Meat Sauce, Bolognese Style.  Ragu is delicious with tortellini and irreproachable with such boxed dry pasta as rigatoni, conchiglie or fusilli.  Curiously, considering the popularity of the dish in the United Kingdom and the countries of the Commonwealth, meat sauce in Bologna is never served over spaghetti.

Procedure:

1) Put the oil, butter, and chopped onion in the pot, and turn the heat on to medium.  Cook and stir the onion until it has become translucent, then add the chopped celery and carrot.  Cook for about 2 minutes, stirring the vegetable to coat them well.
2) Add the ground beef, a large pinch of salt, and a few grinding of pepper.l  Crumble the meat with a fork, stir well, and cook until the beef has lots its raw, red color.
3) Add the milk and let it simmer gently, stirring frequently, until it has bubbled away completely.  Add a tiny grating,- about 1/8 teaspoon- of nutmeg, and stir.
4) Add the wine, let it summer until it has evaporated, then add the tomatoes and stir thoroughly to coat all ingredients well.  When the tomatoes begin to bubble, turn the heat down so that the sauce cooks at the laziest of simmers, with just an intermittent bubble breaking through to the surface.  Cook, uncovered, for 3 hours or more, stirring from time to time.  While the sauce is cooking, you are likely to find that it begins to dry and the fat separates from the meat.  To keep it from sticking, continue the cooking, adding 1/2 cup of water whenever necessary.  At the end, however, no water at all must be left an the fat must separate from the the sauce.  Taste and correct for salt.
5) Add the cooked drained pasta, adding the tablespoon of butter, and serve with freshly ground Parmesan on the side.

  The results?  Amazing and time-consuming!  This sauce takes an amazingly long time!  I started cooking at 11:30 a.m. and didn't have dinner until 6:45 p.m.  The sauce was cooking that whole time!  In addition to the pasta needing to simmer for three hours, it takes hours for all of the milk and all of the wine to cook off.  Also, once I added in the tomatoes, I couldn't quite get it at the perfect lazy simmer (the sauce would  wither bubble too violently or the flame would go out), but I did the best I could and it turned out great!  Considering, that the author said that there is no more perfect union in all gastronomy than the marriage of Bolognese ragu with homemade Bolognese tagliatelle, I knew I had to make fresh pasta to perfectly accompany this dish.  See my previous post about making ravioli for the fresh pasta at http://insearchoftheperfectmacaroniandcheese.blogspot.com/2011/02/fresh-pasta-aka-homemade-ravioli.html.  Only thing that changes is that instead of making ravioli, you simply roll the flattened pasta dough on itself and cut it into 1/4 inch strips to make extra-wide noodles.  This is most very definitely worth the extra effort; the pasta was cooked to perfection and matched beautifully with the sauce.  The sauce was rich, meaty, complex and absolutely amazing.  I served it with salad, bread and butter from the Parma region of Italy (I highly recommmend buying this butter if you ever find it; it is like eating sunshine on a field).  I will definitely be making this recipe again, especially for special celebrations!  I hope that you enjoy!


Monday, January 18, 2016

Vegetable Curry with Lamb

  After being MIA for all of 2015, I decided to take up blogging again.  Alas, I don't think I am going to be able to blog as much; a forty-hour work week on top of a three hour round trip commute really eats away at your cooking time!  However, I'd like to record at least some of the yummy things that I make!  Together, my husband and I made a New Year's resolution to eat more of a plant-based diet.  We have been trying to cook more at home to save our budget and our health!  I've been looking through my healthy cookbooks, especially The VB6 cookbook by Mark Bittman and came across this recipe.  I've always loved curries and I think you'll love it too!


Vegetable curry with lamb

Cooking in the pot.  Yum!


Vegetable Curry with Lamb from The VB6 Cookbook by Mark Bittman

Makes: 4 to 6 servings
Time: 1 to 2 hours, mostly unattended

Note: A classic curry- with lots of vegetables- is far simpler to make than you might think.  Just brown the meat; add the vegetables, stock, and aromatics; and let it simmer on the stove- it does its thing while you do yours.  This reheats beautifully too, making it the ideal meal for weeknight entertaining or freezing for ready-to-eat suppers on hectic nights.  Serve it with the bread on page 249 or brow rice (basmati is best here).

Ingredients:

2 tbsp. vegetable oil
1 lb. boneless lamb shoulder, cut into 1-inch chunks
1 tsp. salt
1/2 tsp pepper
1 large onion, halved and sliced
1 red bell pepper, chopped
1 zucchini, chopped
1 small head cauliflower (about 1 pound), chopped
1 tbsp. minced garlic
1 tbsp. minced fresh ginger, or 1 tsp ground dried
2 tbsp. curry powder
1/2 tsp cayenne (optional)
2 cups chicken or vegetable stock or water, or more as needed
1/2 cup Greek yogurt
1/2 cup chopped fresh cilantro leaves, for garnish

Procedure:

1) Put the oil in a large pot over medium-high heat.  When it's hot, add some of the lamb and sprinkle with some of the salt and pepper.  Cook, adjusting the heat and turning the pieces as needed so the meat doesn't burn, until it's well browned on all sides, 5 to 10 minutes.  As the meat browns, transfer it to a plate and continue adding more meat, seasoning it, and cooking the pieces until all the meat is browned.

2) Pour off all but 2 tablespoons of the fat and turn the heat down to medium.  Add the onion, bell pepper, zucchini, cauliflower, garlic, and ginger, and cook, stirring occasionally, until the vegetables being to soften, 5 to 10 minutes.  Add the curry powder and cayenne, if you're using it, and cooking, stirring constantly, until fragrant, 1 or 2 minutes.

3) Stir in the stock, scraping up any browned bits from the bottom of the pot, then add the browned lamb.  The meat and vegetables should be about halfway submerged in braising liquid, if not, add more liquid.  Bring to a boil, then lower the heat so the mixture barely bubbles.  Cover and cook, stirring every 30 minutes and adding small amounts of liquid if the stew ever looks dry, until the meat is tender enough to cut with a fork, another 15 to 30 minutes.

4) If the curry looks too watery, remove the lid, raise the heat a bit, and cook, stirring frequently, until it thickens.  If it looks too dry, add a little more stock or water and raise the heat until bubbly.  Remove from the heat.  Stir in the yogurt.  Taste and adjust the seasoning, then garnish with the cilantro and serve.

  Talk about eating the rainbow!  The vegetables alone are a colorful addition to this curry.  It was quite yummy and the lamb was delicious, but I would've wanted it maybe a tiny bit more creamy.  It is also a bit hard to tell from the recipe how long you should cook it; I ended up cooking it for about ninety minutes.  It was definitely worth it; yummy, healthy, spicy and went wonderfully with brown rice!